This article provides guidance on the following topics:
System Interface Overview – Understanding how the Sales Order (SO) module integrates with Inventory, Accounting (Invoices and Accounts Receivable), "Shipment", and "Customers" modules.
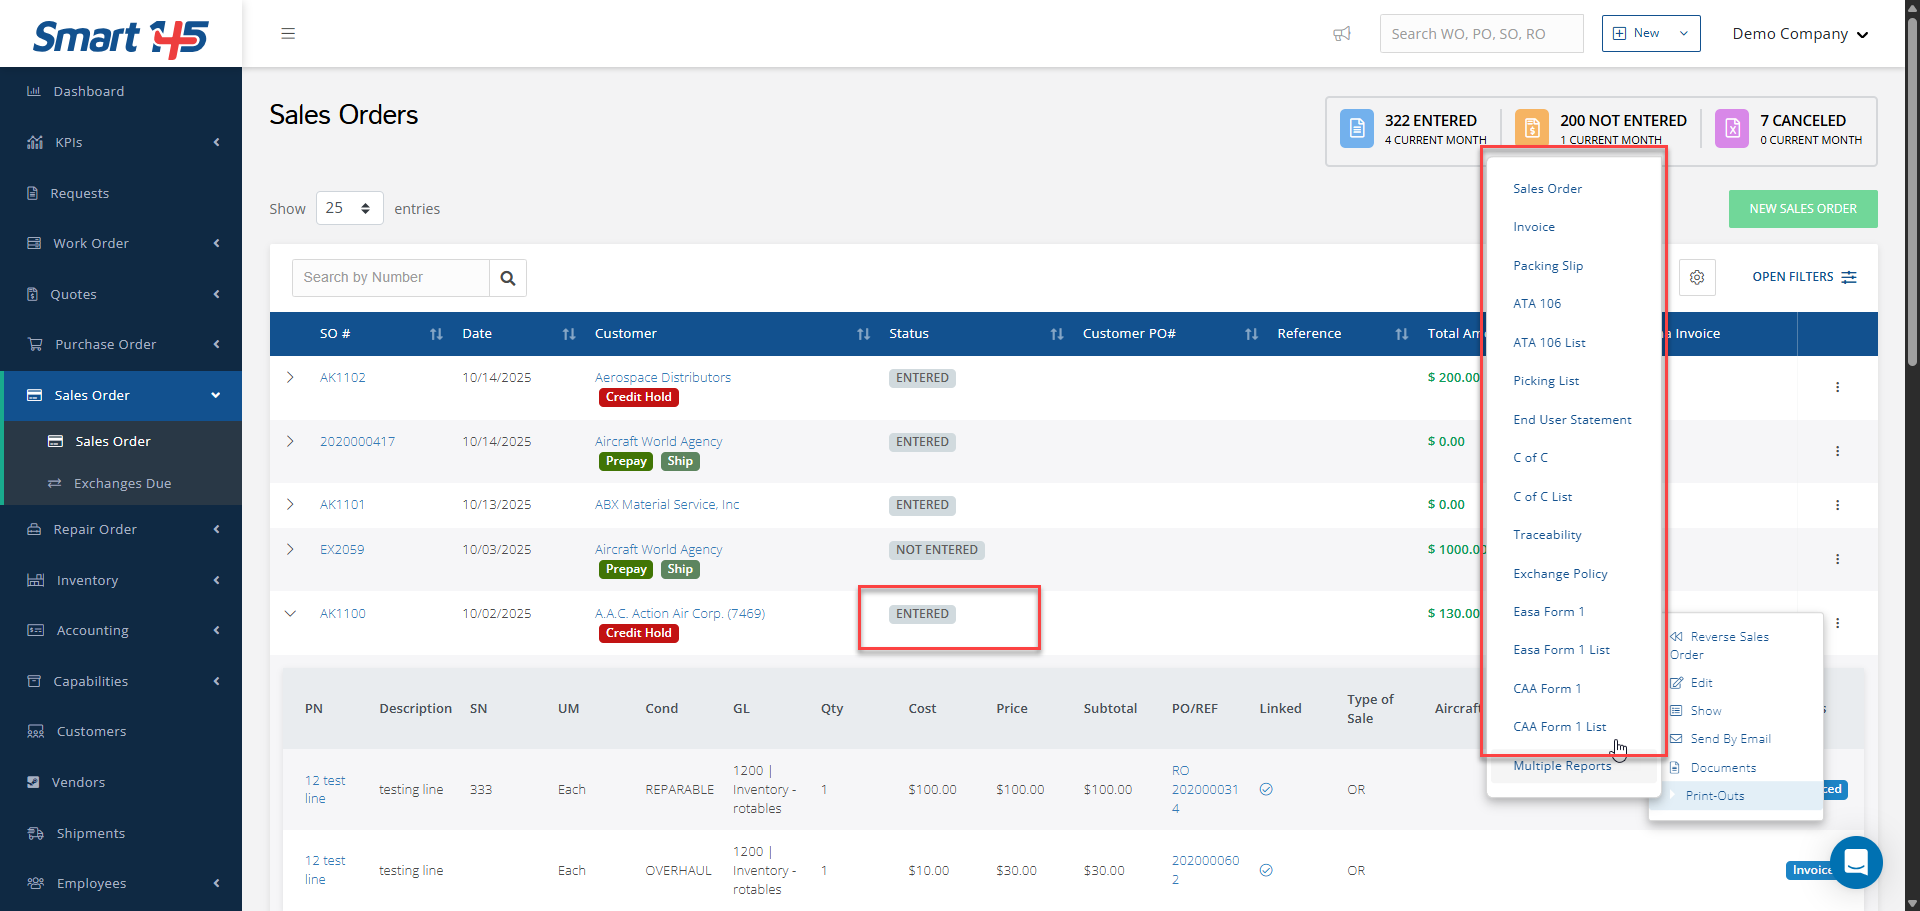
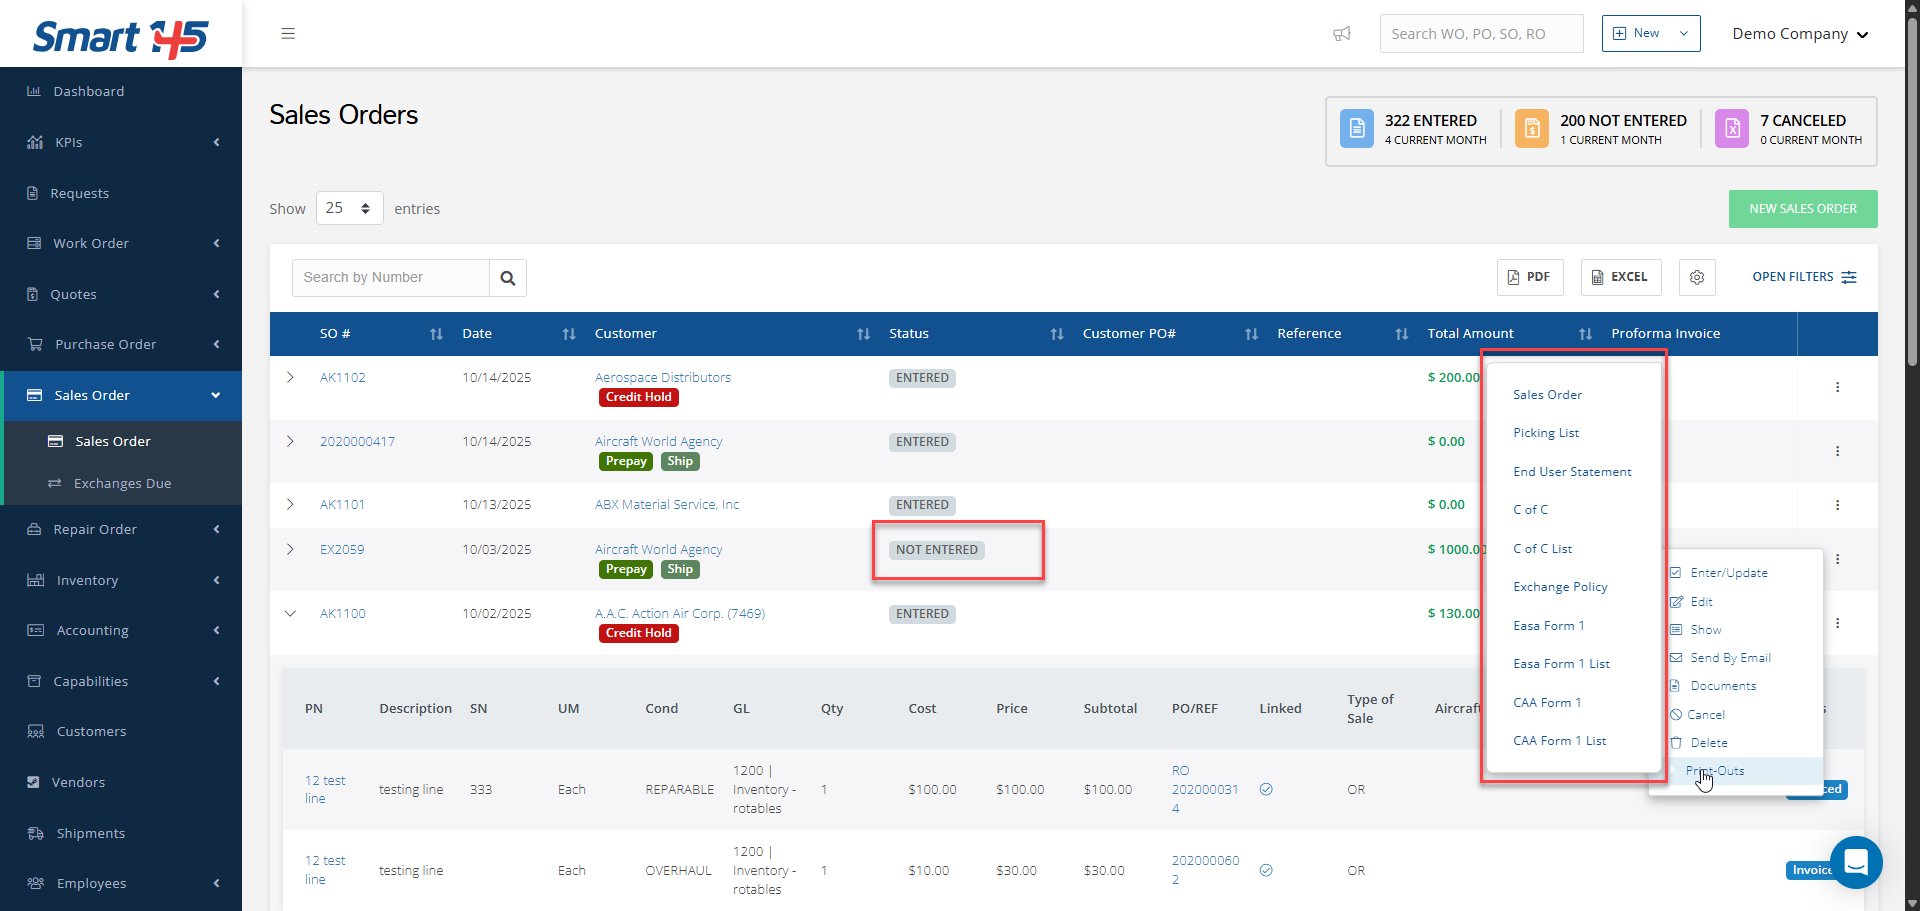
Related Reports – Identifying which reports, aside from the Sales Order printout, are linked to the SO browser and when they can be generated.
Editing Invoiced Sales Orders – Understanding the options for making changes to a Sales Order after it has been invoiced.
1- In the SMART system, the Sales Order (SO) module is closely integrated with several other related modules. When creating a Sales Order, you must enter all relevant information regarding the sale, including the customer details, items being sold, and their associated prices. During the creation process, you can also include information such as the Air Waybill (AWB) and Shipping service. If not, they can be added later under the “Shipments” section. Inventory Module
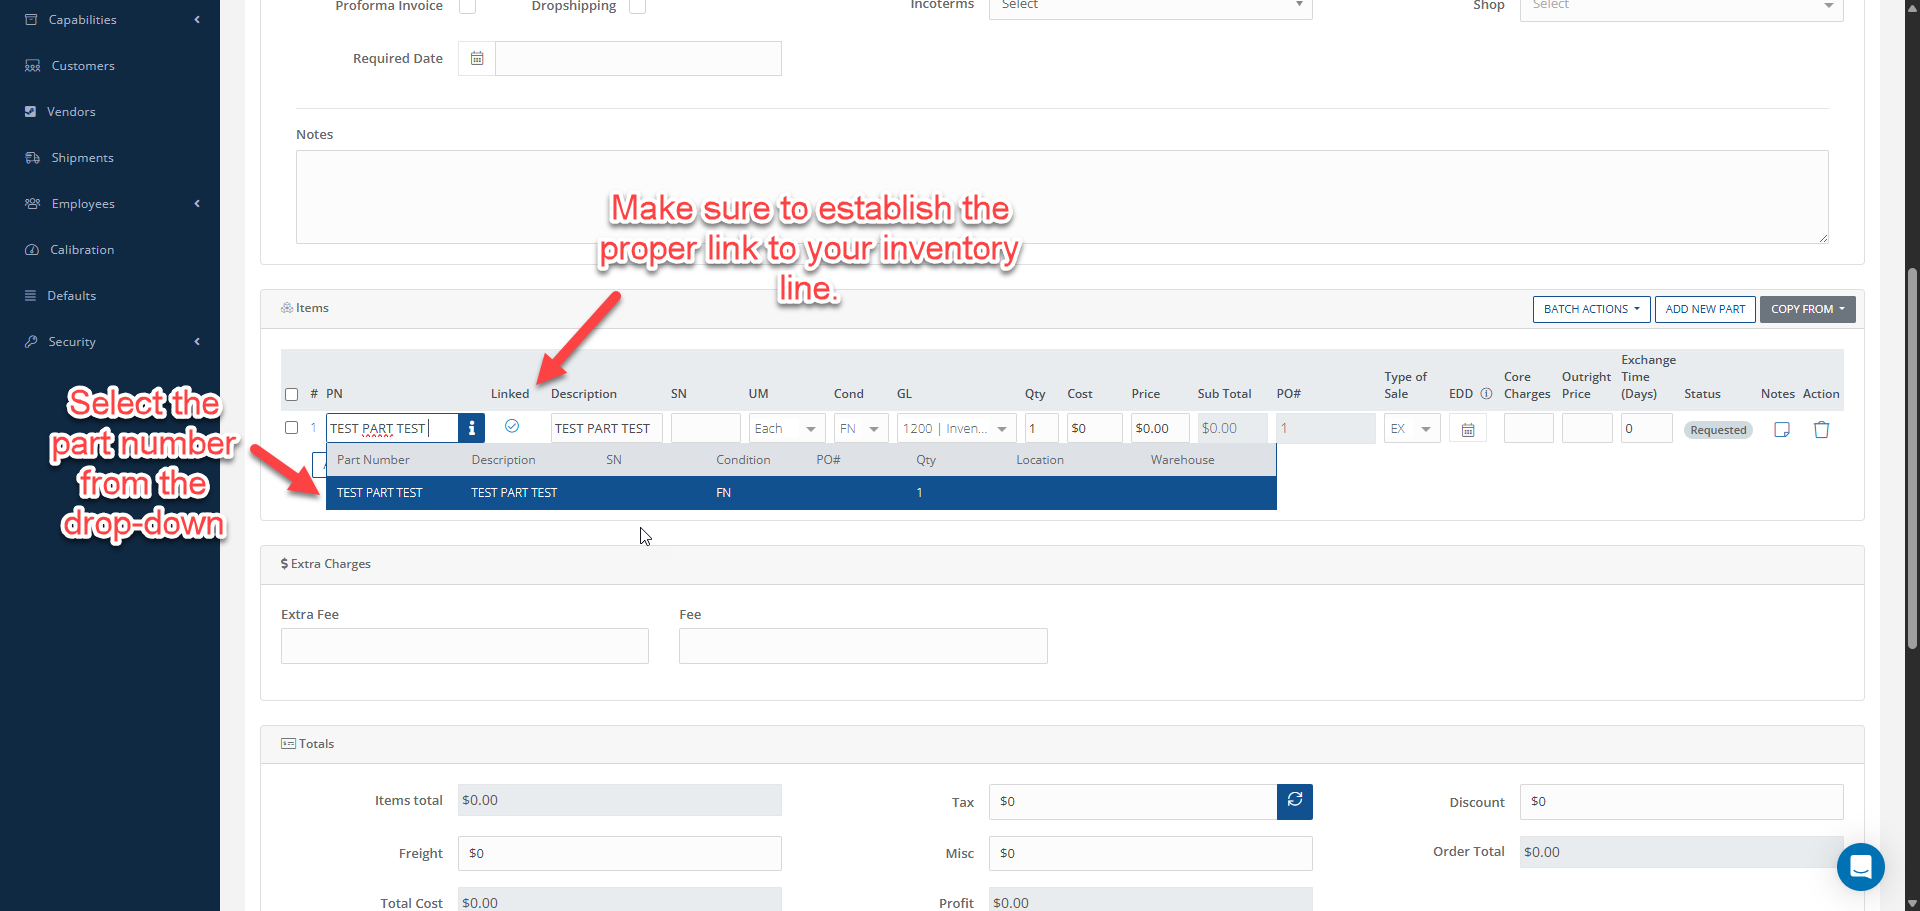
- If you are selling items from your inventory, you must link the Sales Order (SO) line to the corresponding inventory line. This ensures that a record of the sale is automatically created under the SO/RO tab in the Inventory module, and that once the order is invoiced, the item is properly removed from stock. Click here for more details regarding this process.
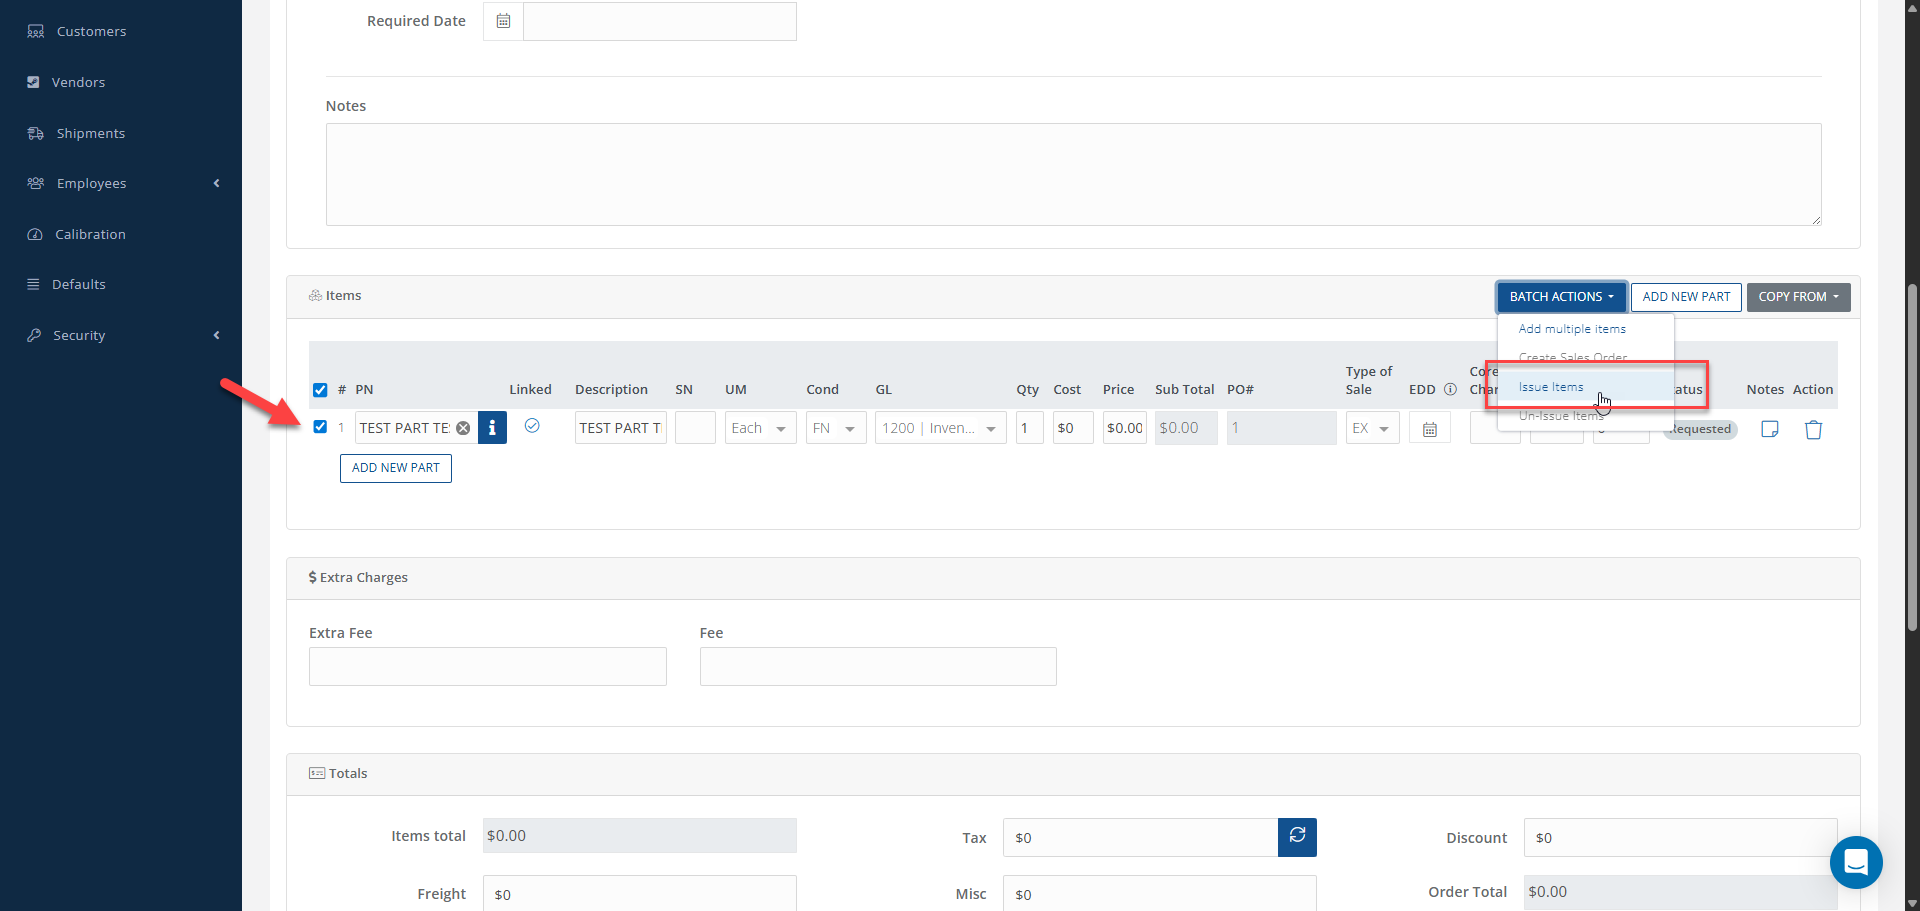
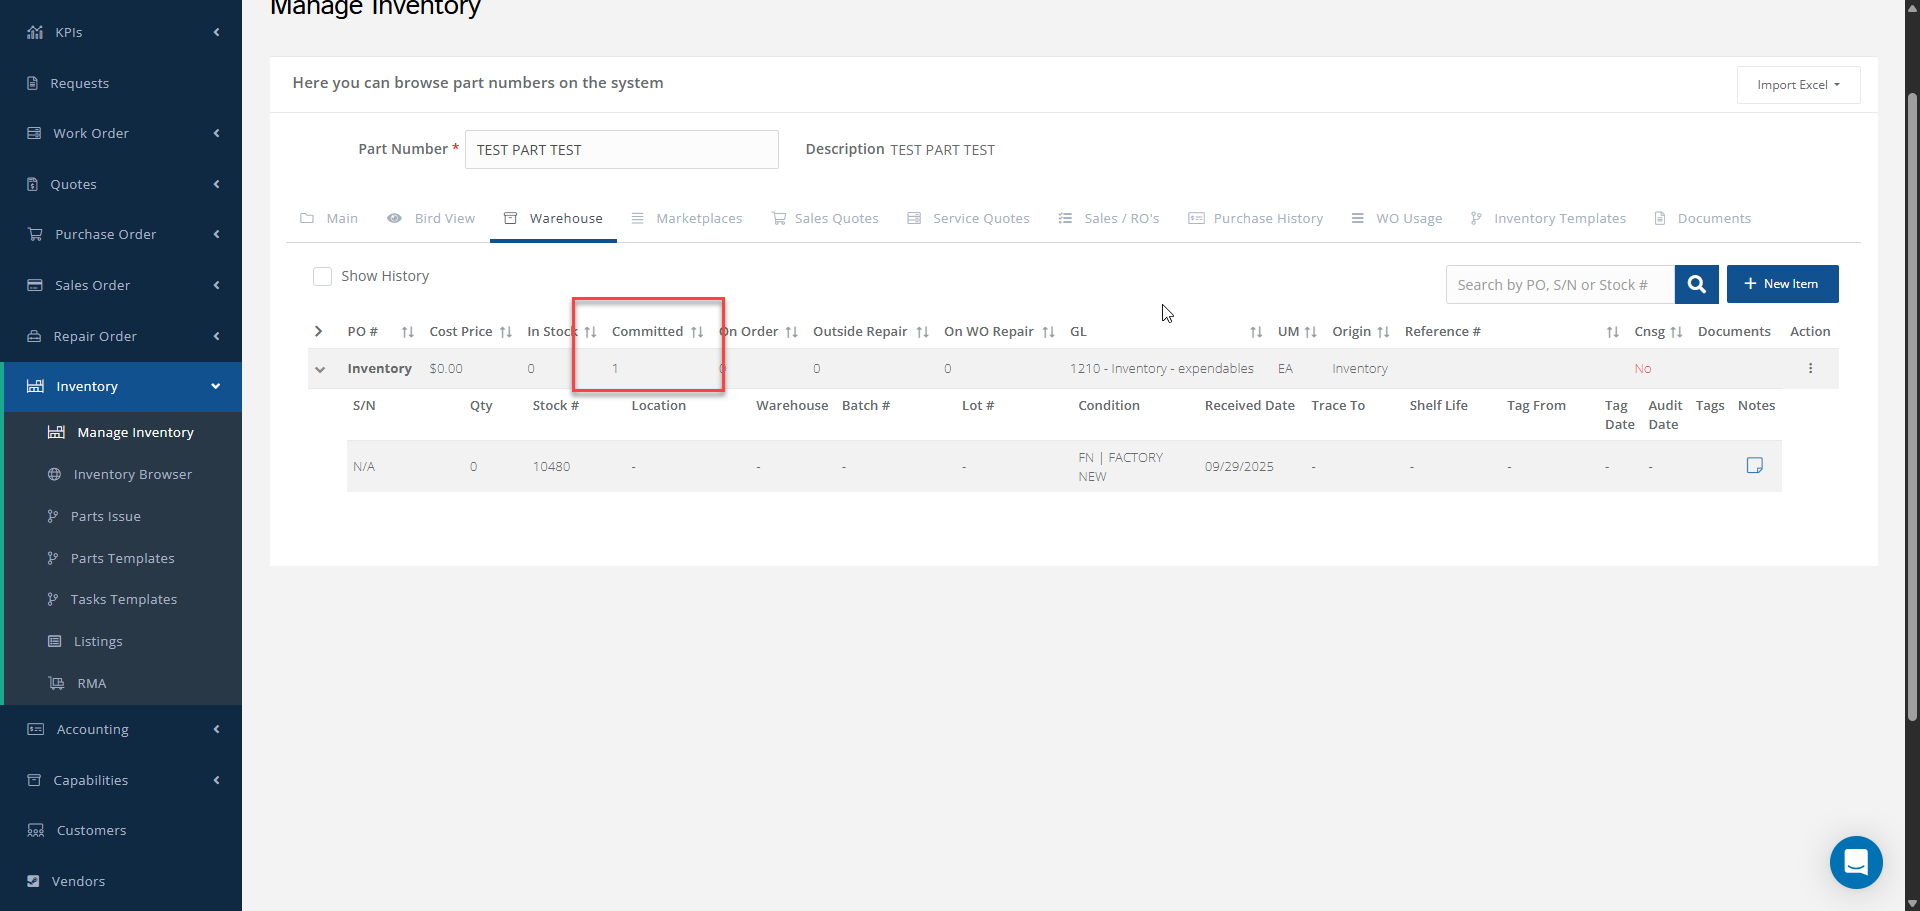
- During the SO creation process, you also have the option to issue parts to the Sales Order. This means that the selected inventory items are assigned exclusively to that specific SO, making them unavailable for any other transaction in the system. Once a part has been issued, its status will change from “In Stock” to “In Committed” within the inventory record. After the order is entered and invoiced, the item will be removed from your inventory, and the related sales record will be generated.
You can visualize these relationships and movements across the various Inventory tabs:
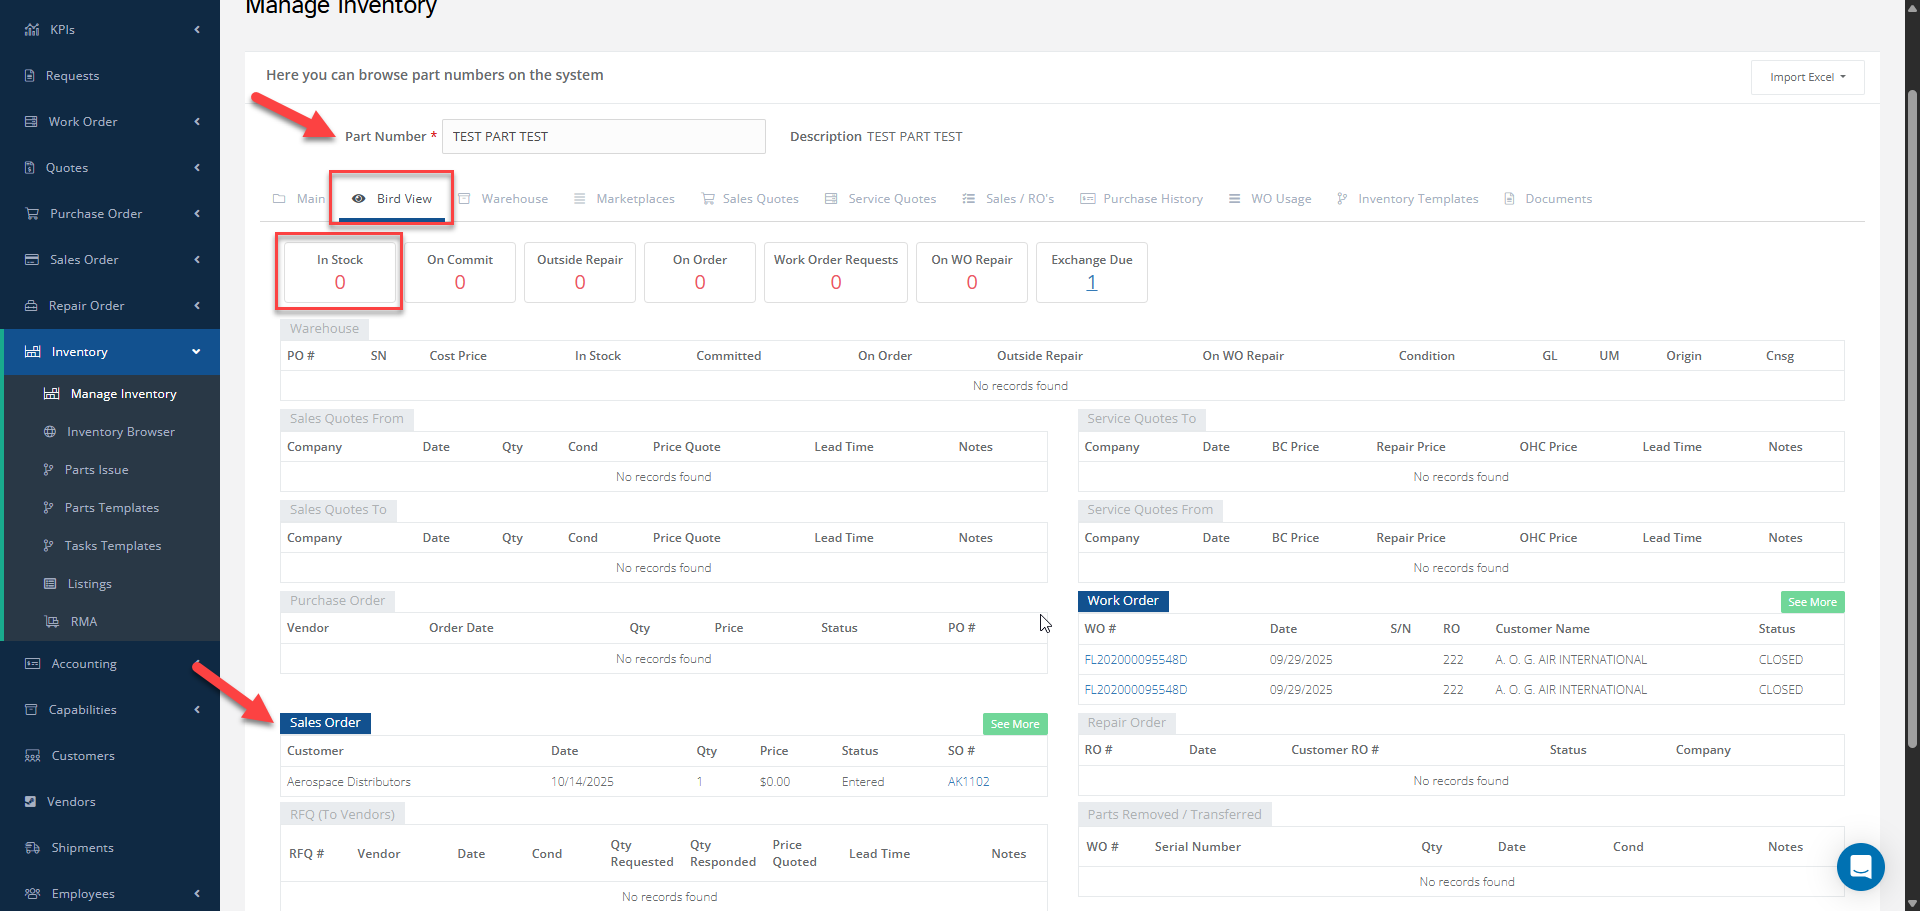
In the Bird View, you can see the associated cards and the corresponding Sales Order, providing an overall overview of the part’s activity.
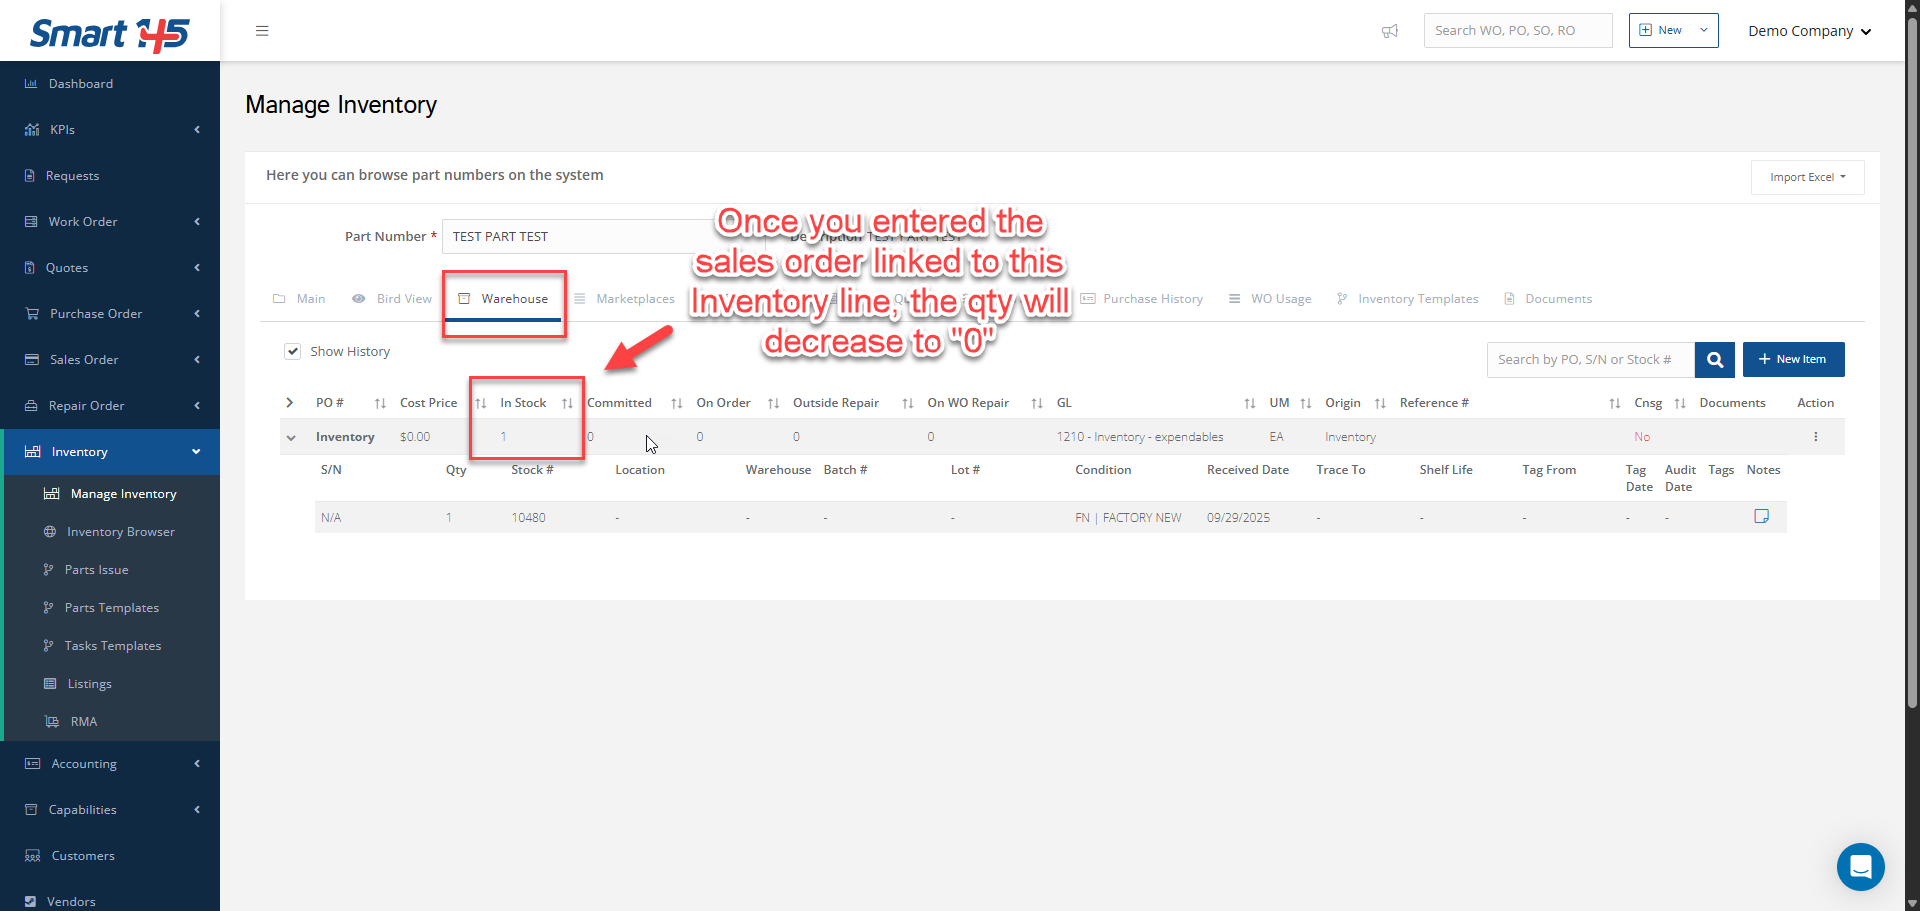
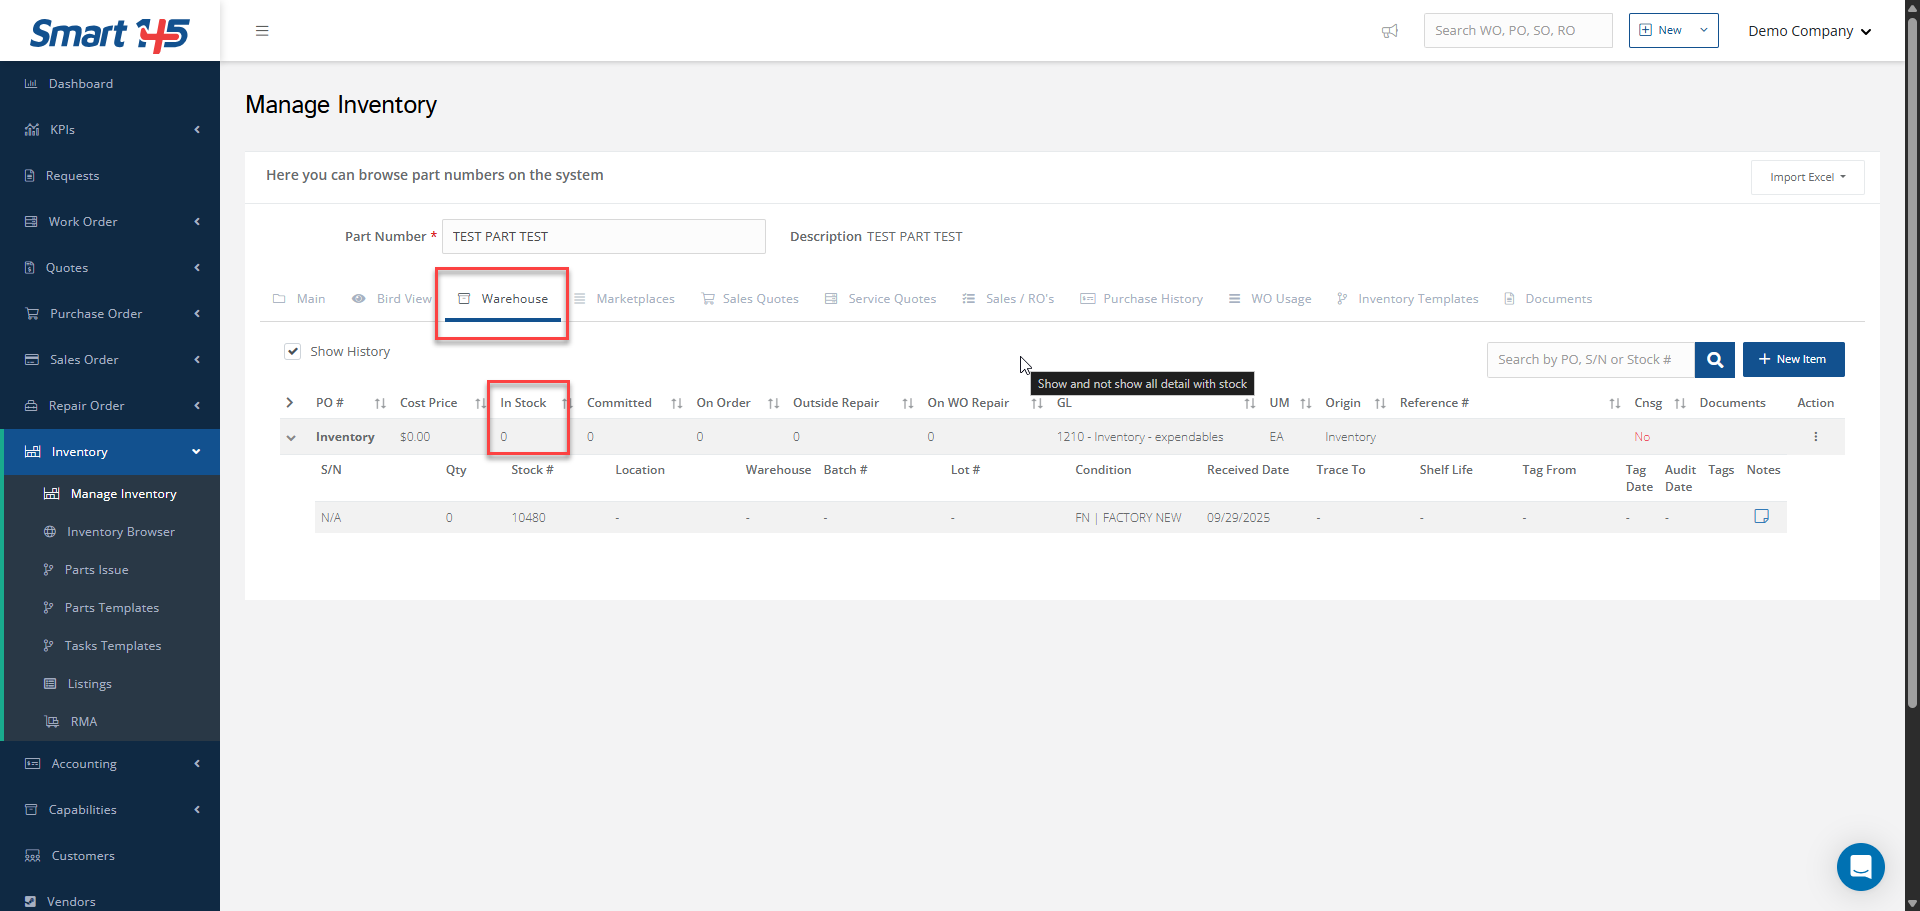
In the Warehouse section, you can monitor stock movements and track when items transition from In Stock to Out of Inventory after the Sales Order is entered.
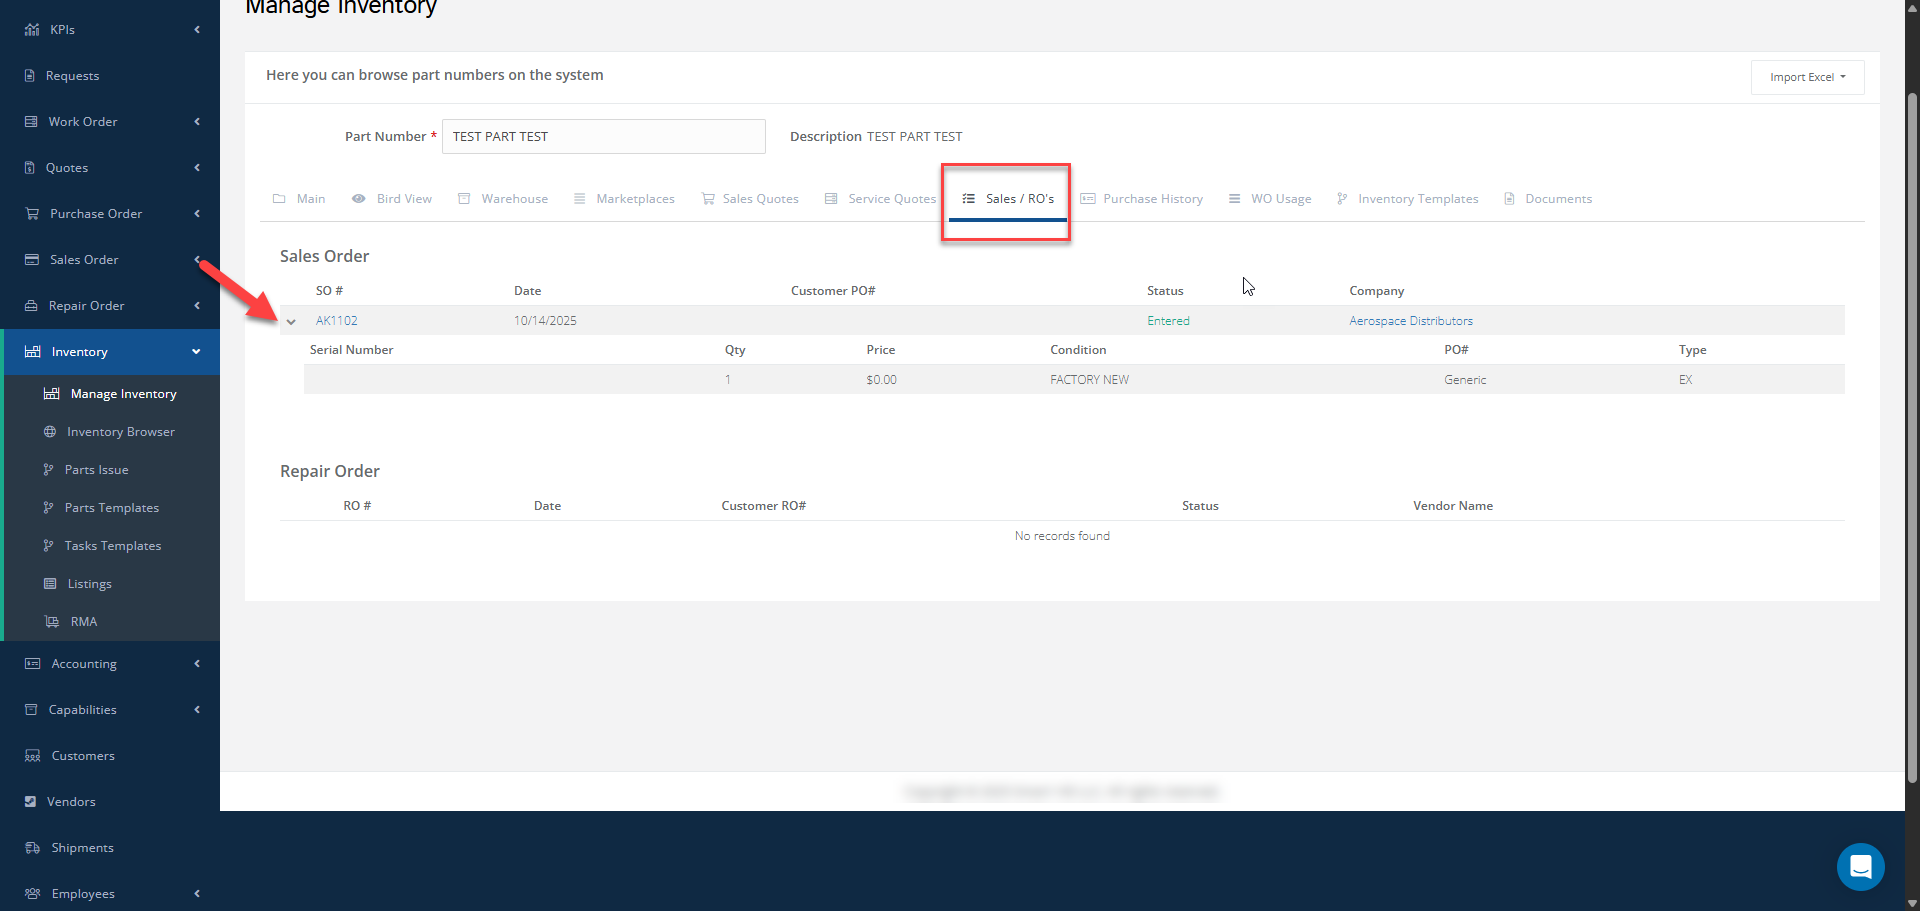
Finally, under the Sales/RO tab, you’ll find the automatically created record that reflects the sale of the item.
Please refer to the images above for reference.
Shipment Module
The Sales Order and Shipment modules operate independently within the system, and each one has its own set of user permissions.
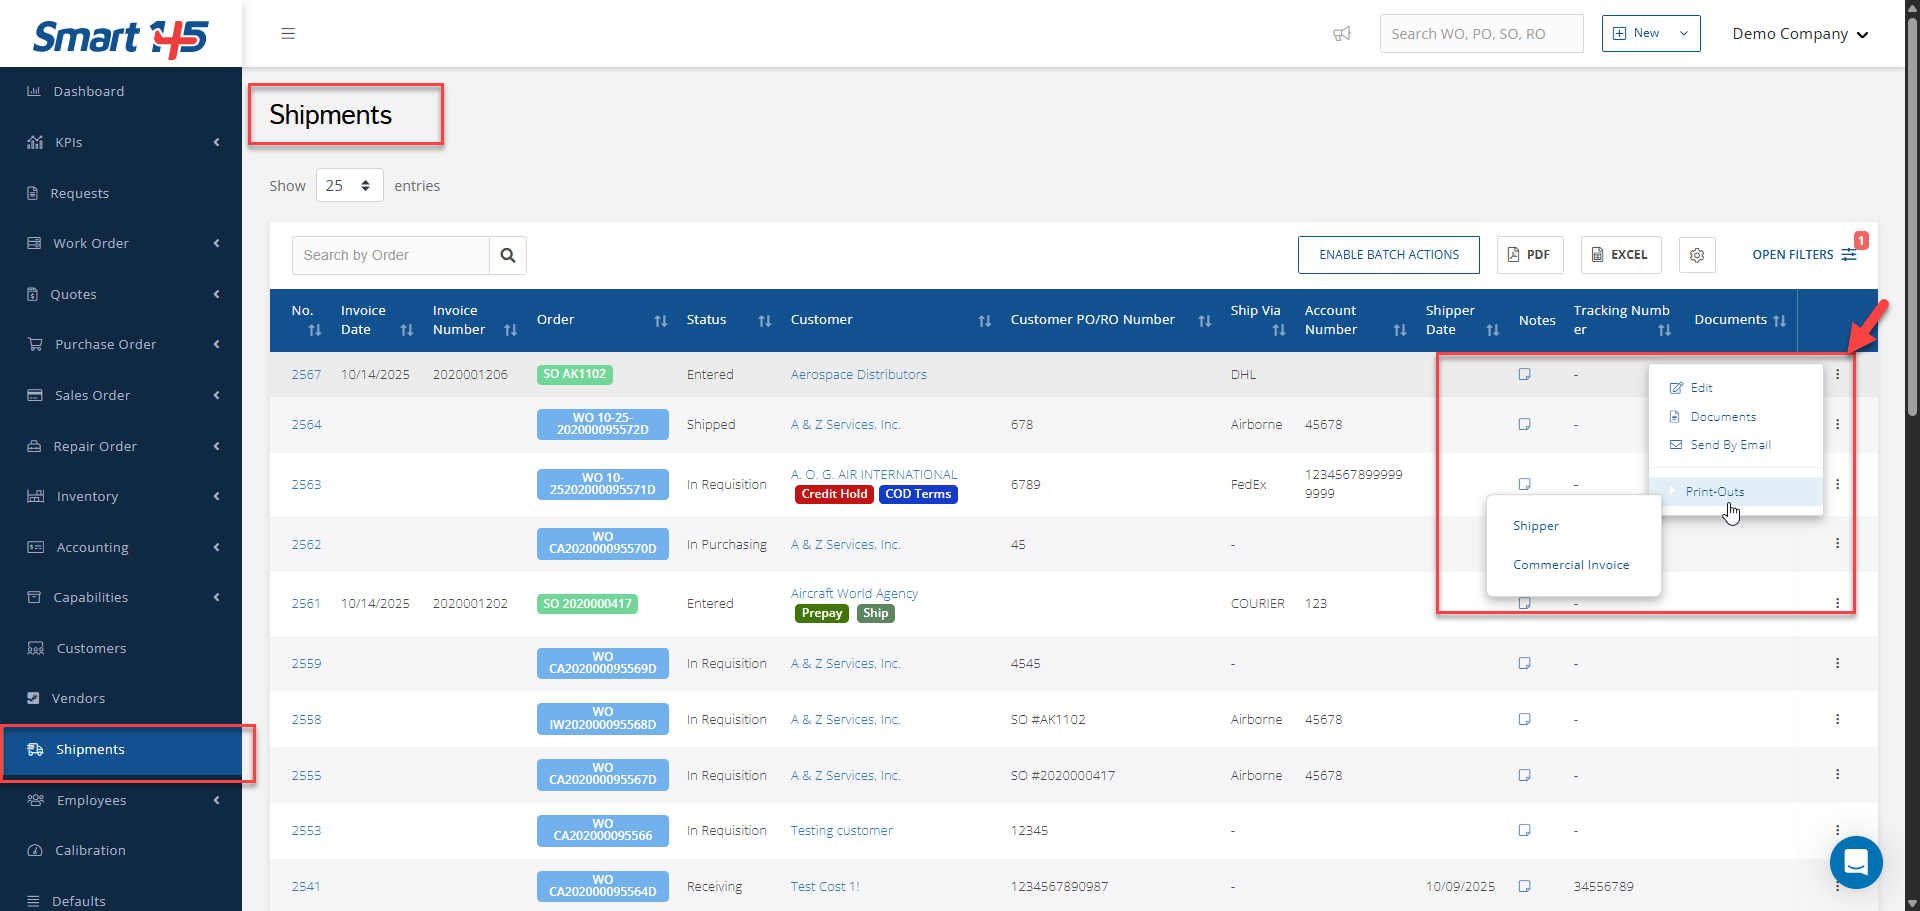
However, once a Sales Order is entered or updated and its items are released from inventory, a shipment record is automatically generated in the Shipment module for that specific Sales Order.
If any shipment-related information was not entered during the SO creation, you can edit the shipment record directly from this module to add or update details as needed, for example the tracking number and ship via.
From this same section, you can also print the related reports, such as the Shipper/Packing Slip and the Commercial Invoice reports.
Accounting (Invoices & Accounts Receivable) and Customers Modules
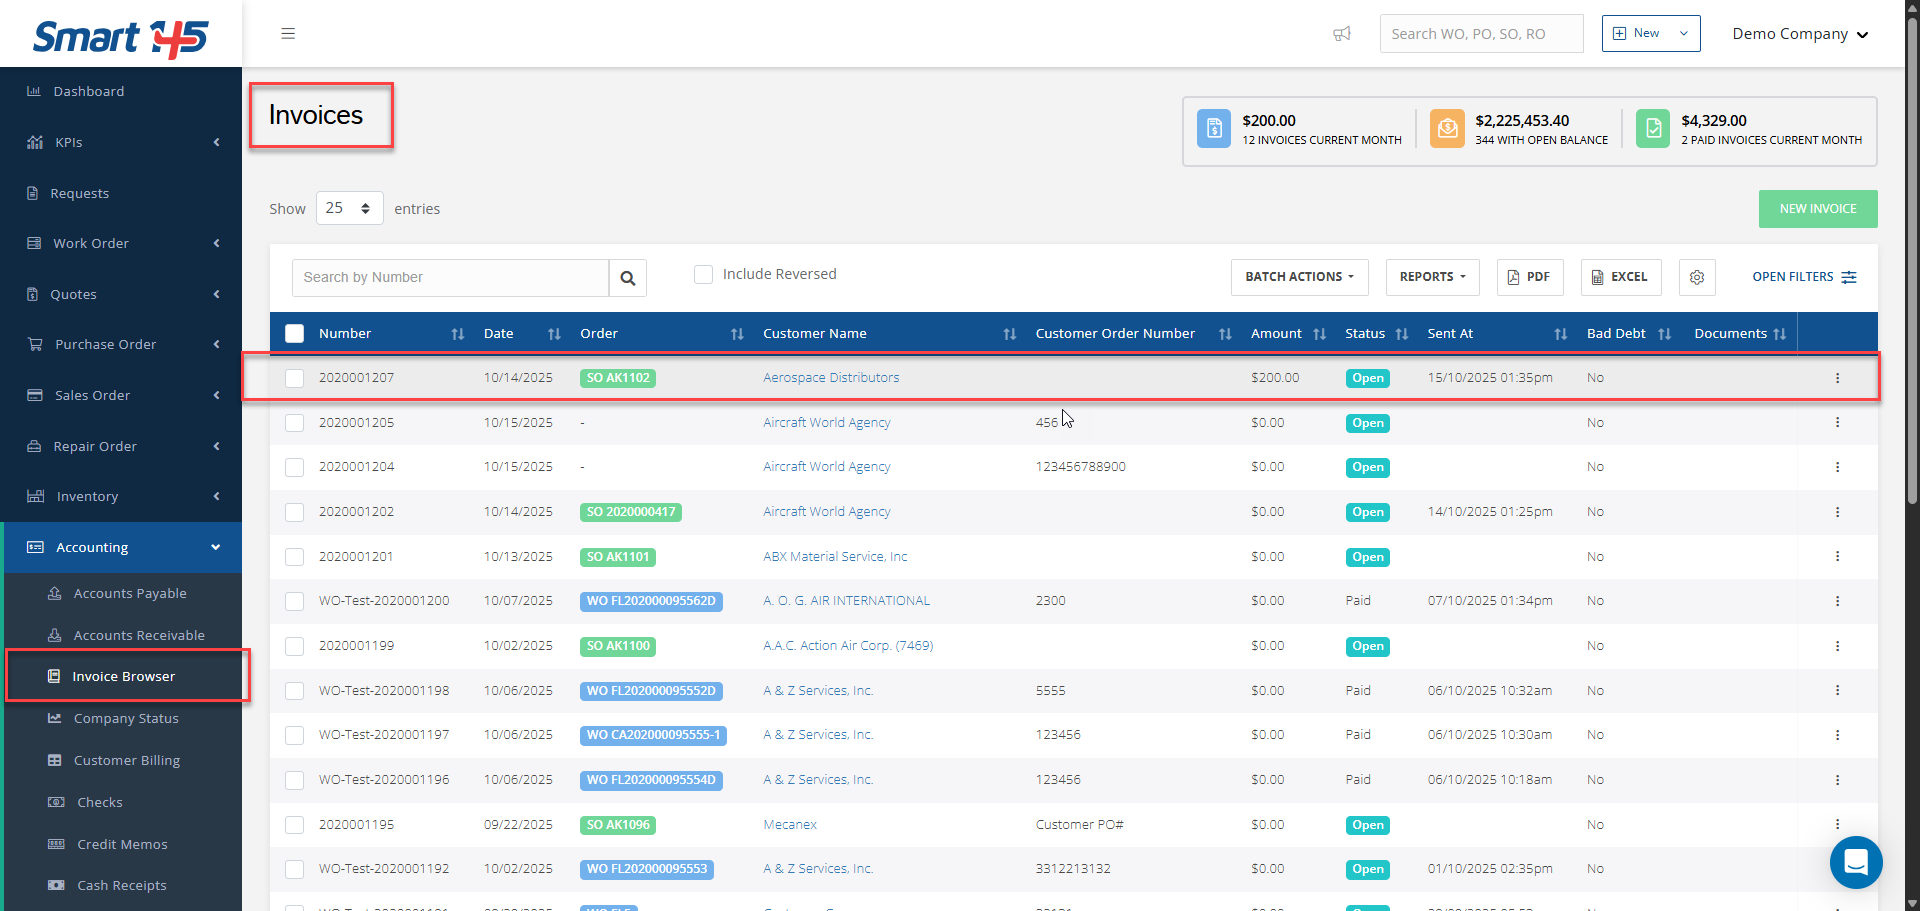
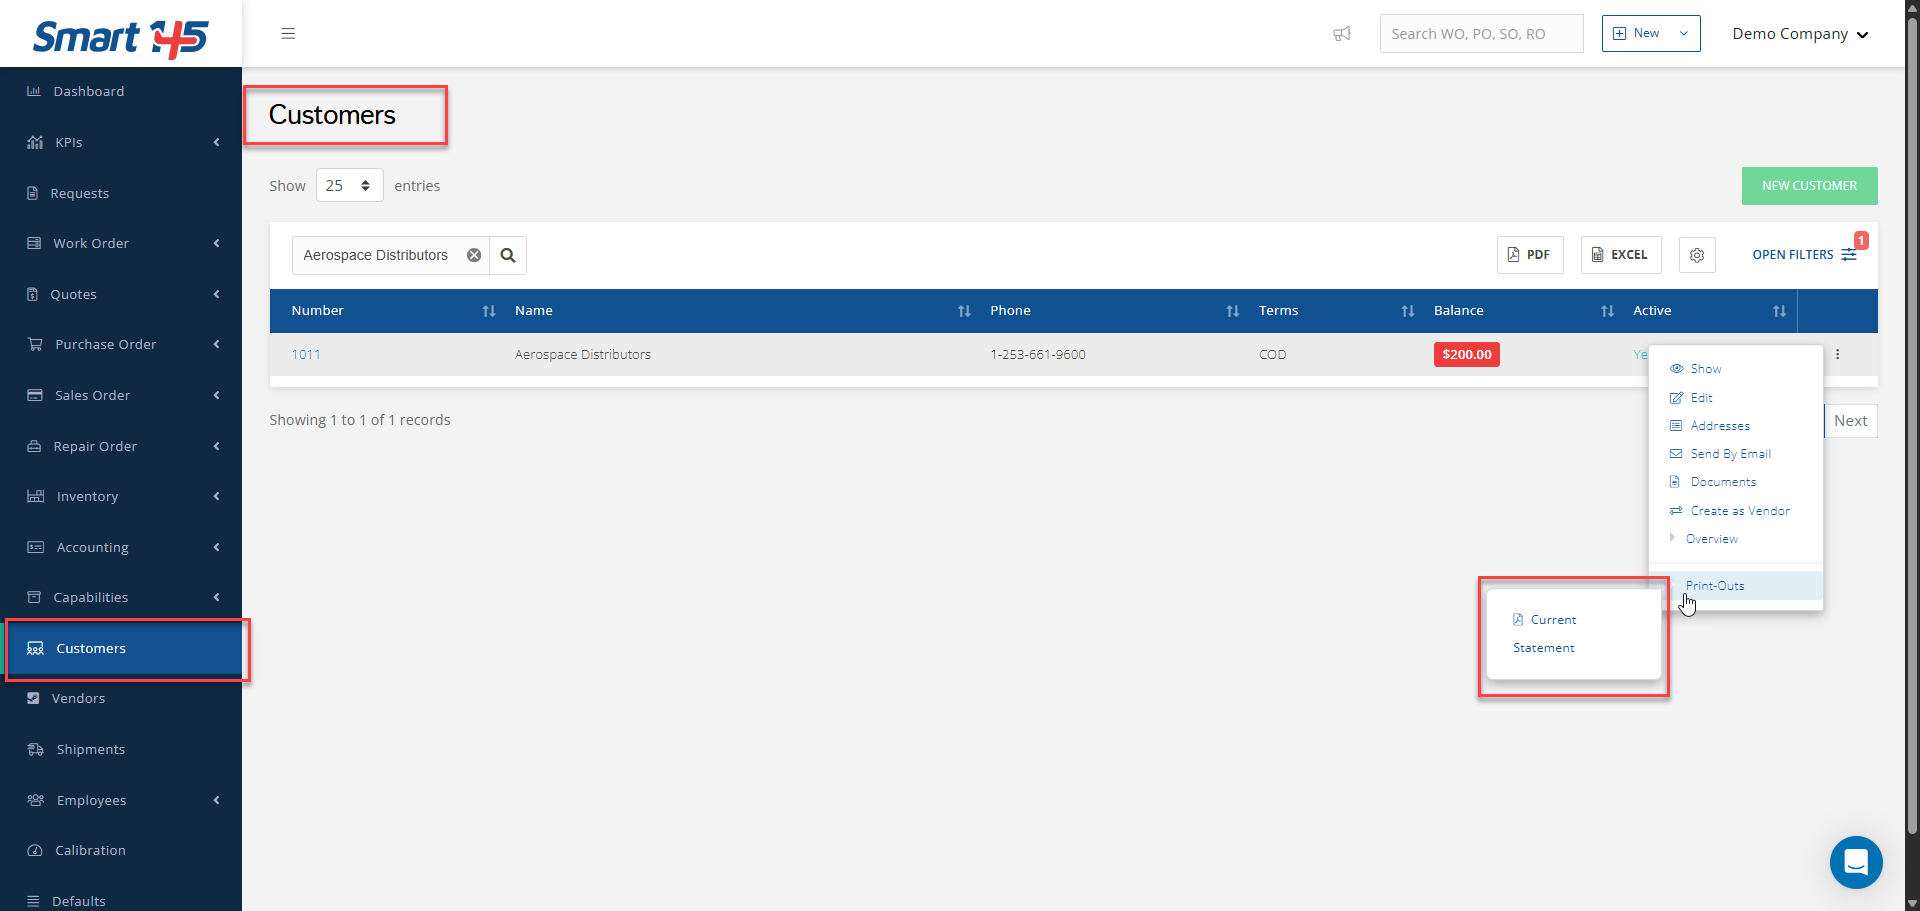
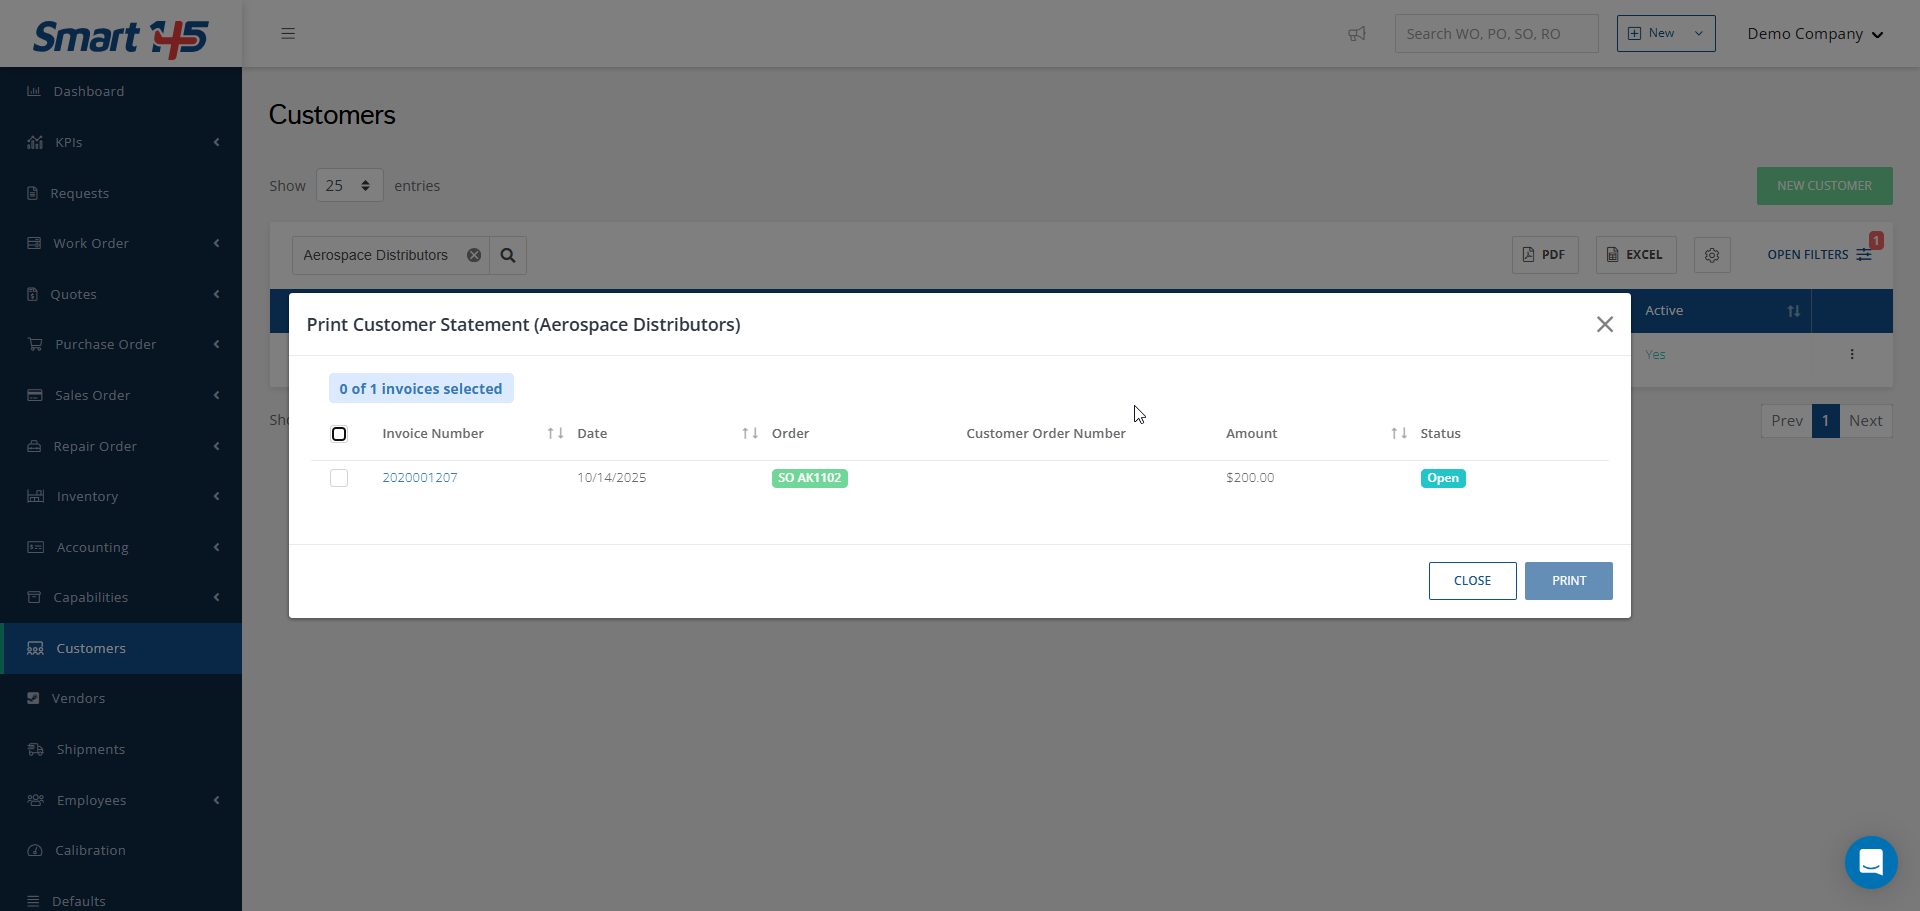
Once a Sales Order is entered or updated, an invoice is automatically created. This invoice will appear in the Current Statement Report of the customer associated with that Sales Order.
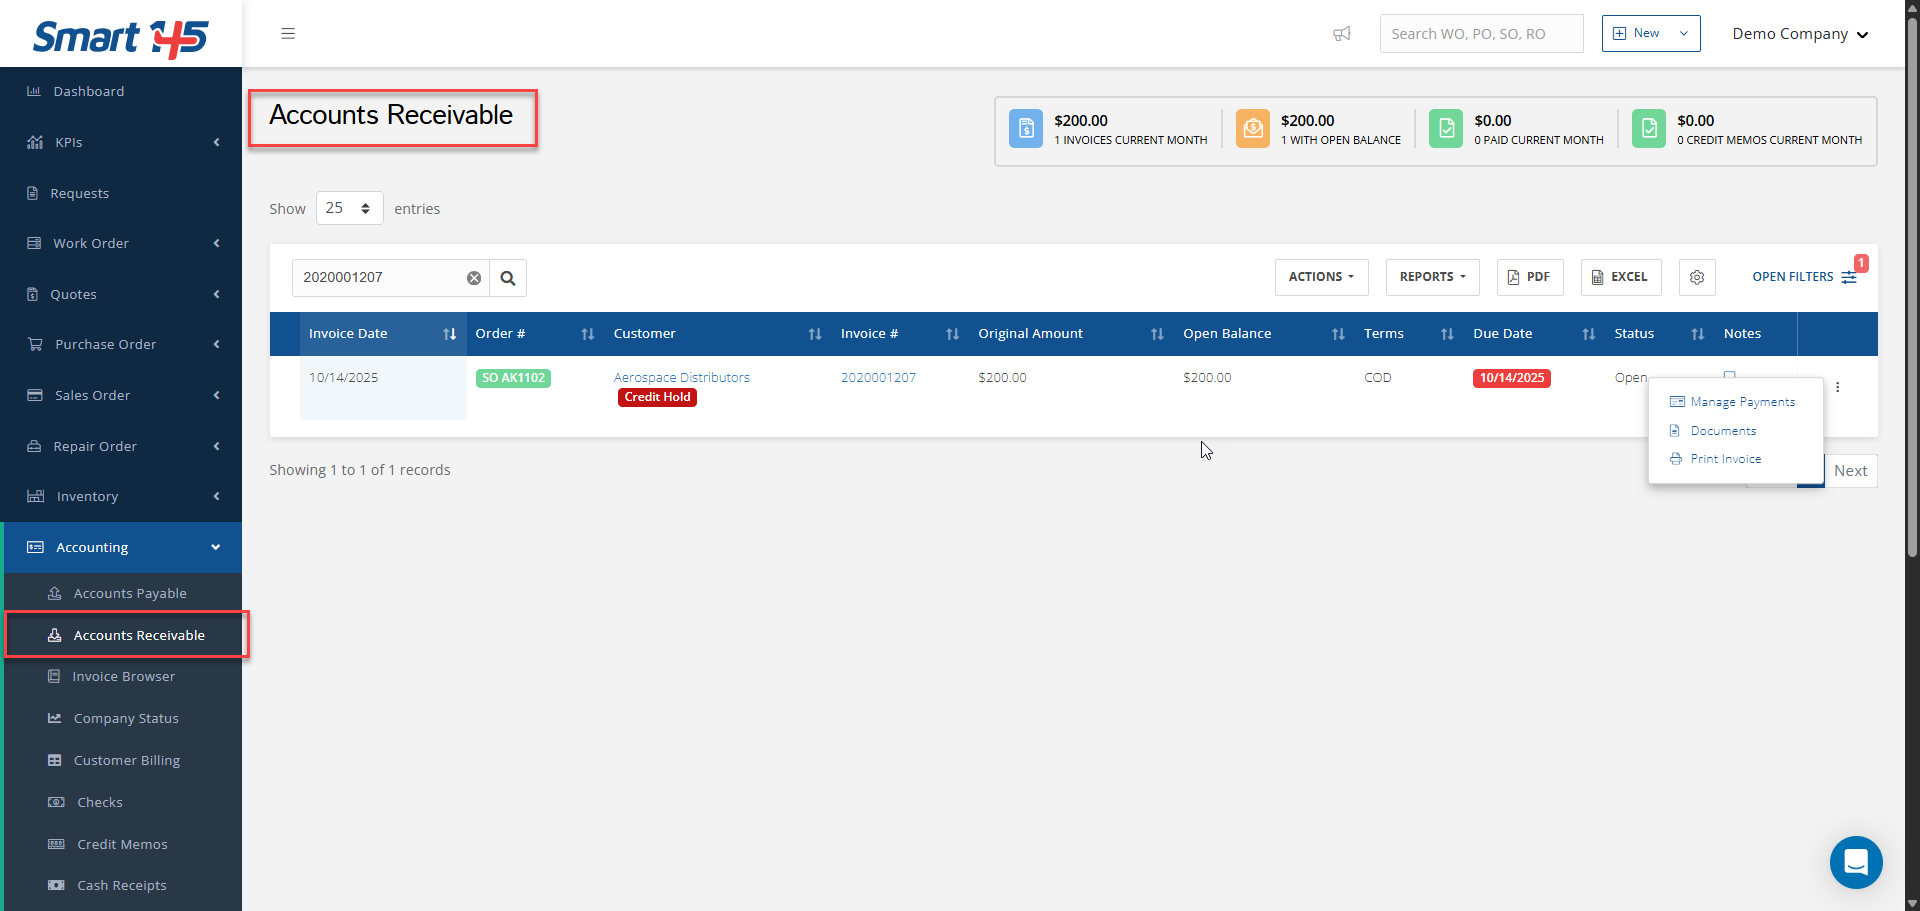
In addition, a corresponding record is generated in the Accounts Receivable (AR) module. This allows you to properly record and track customer payments once the invoice has been paid, ensuring that all financial transactions are accurately reflected within the system.
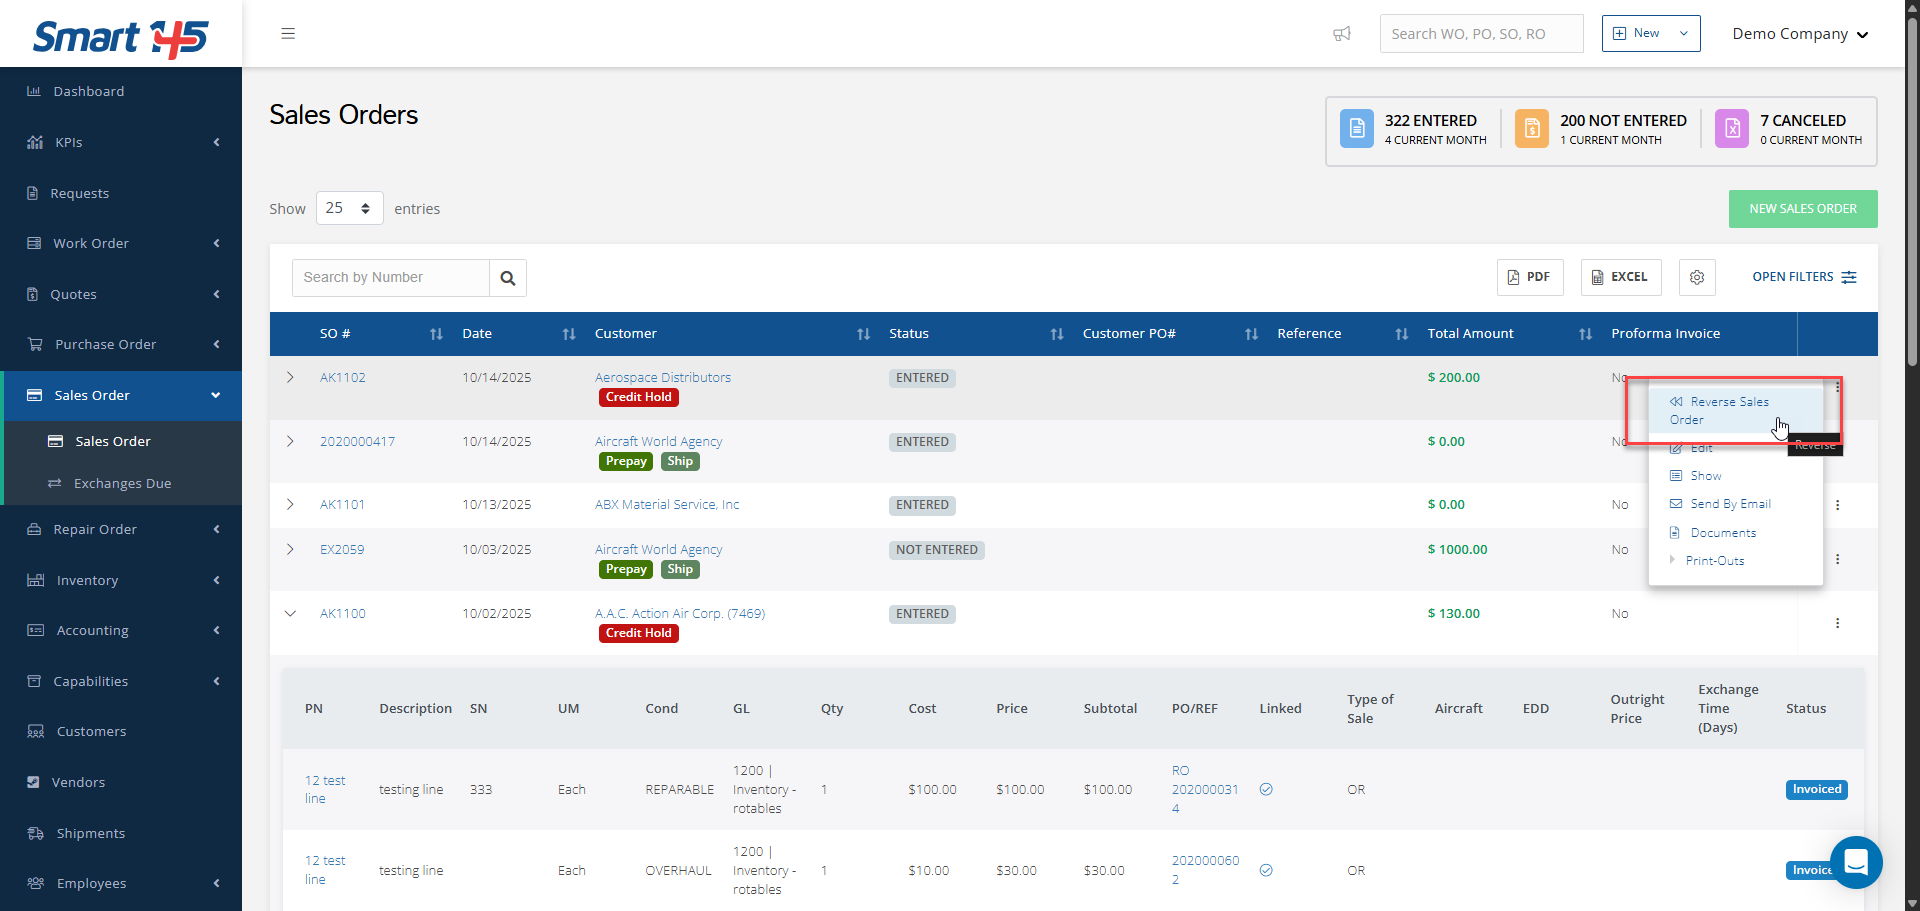
Notice that after reversing a Sales Order, its records will get erased from the other modules, including the customer's statement.
2- Several reports can be generated from the Sales Order module. Keep in mind that certain reports, like the "Packing Slip/Shipper" and the "ATA 106," will only be available for printing once the Sales Order has been entered.
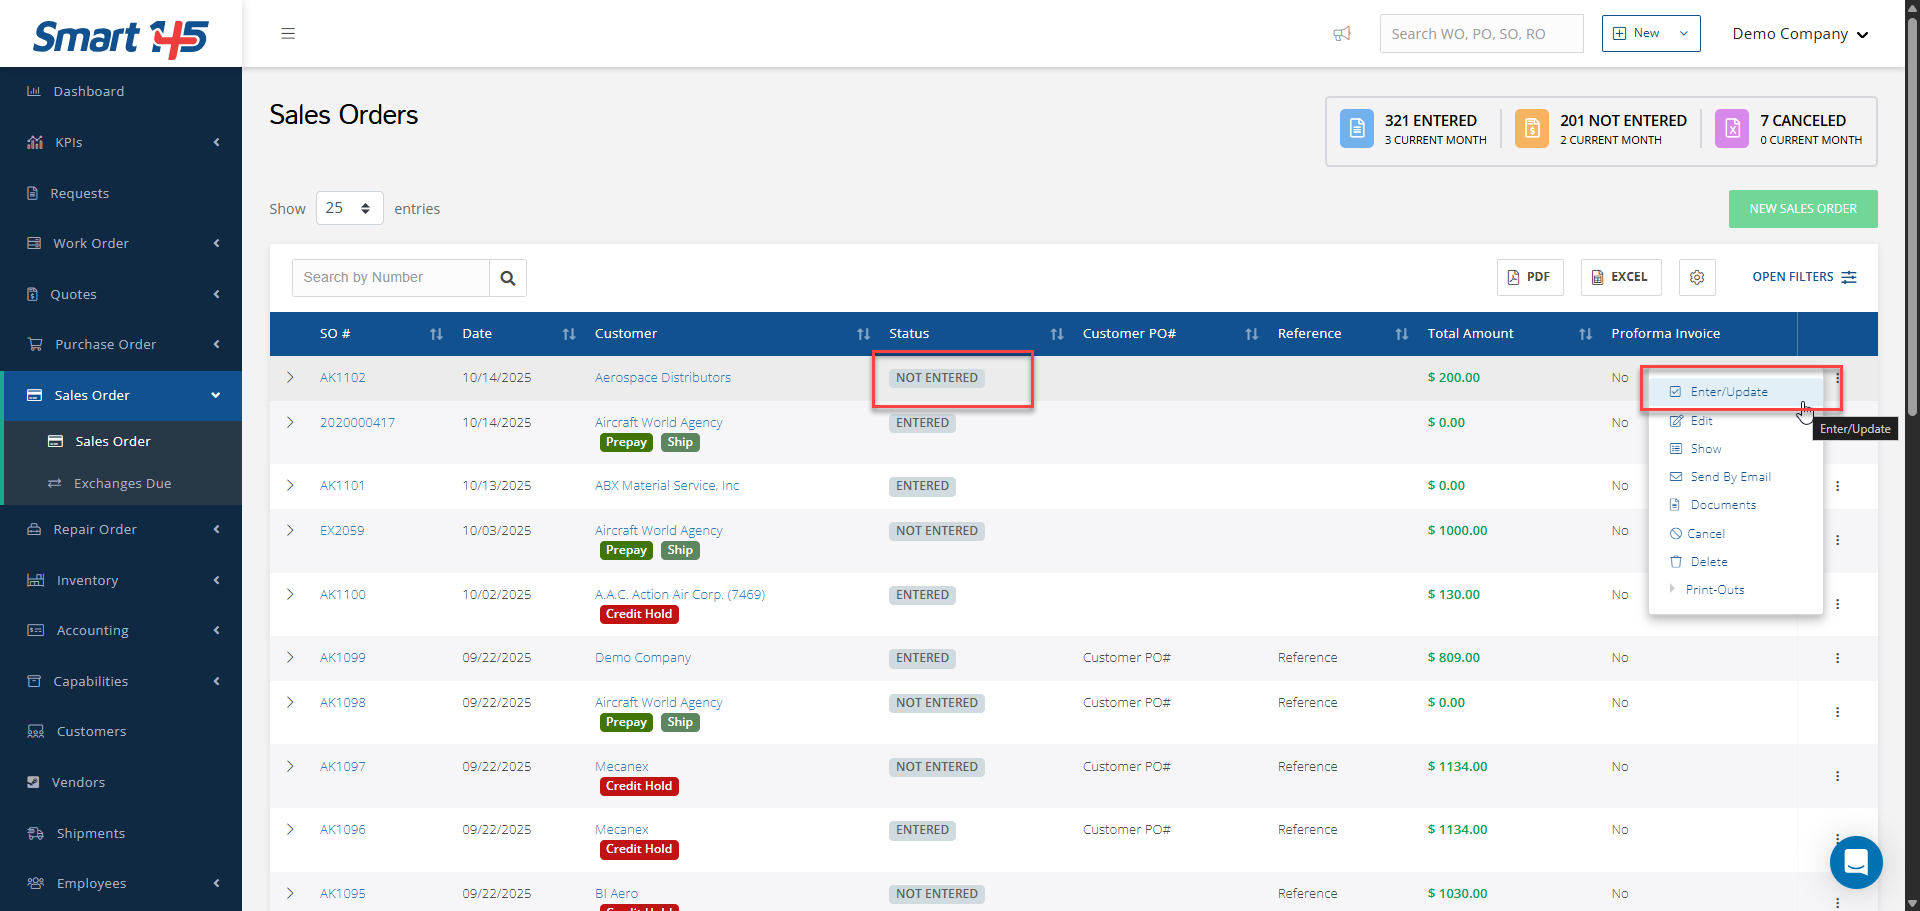
3- An Invoiced SO cannot be changed unless the invoicing process is reversed. Only then does the edit function get enabled on the right 3 -dot menu.
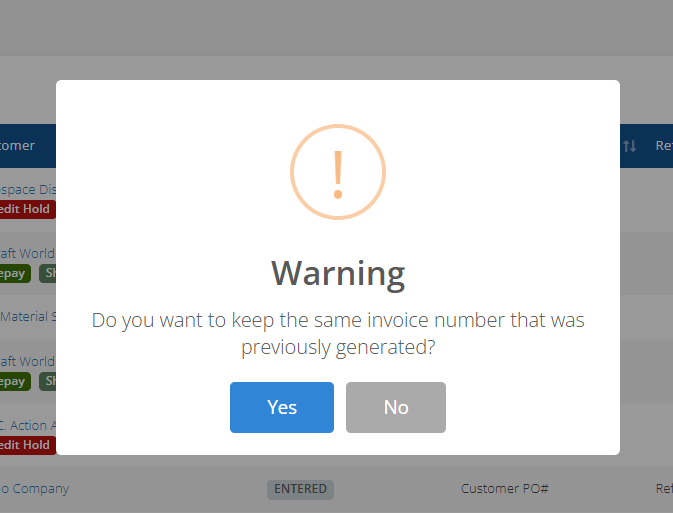
Notice that after the changes are made, the SO has to be reentered, and the system will prompt you to decide whether to keep the same invoice number or to assign a new one.