In the system, there are two related but different concepts: Templates and Kits.
- Templates are predefined lists of the parts most often used for a specific unit or job. They don’t reserve inventory; they only serve as a reference.
- Kits, on the other hand, reserve those parts in stock as a single package, so they can’t be used in another WO, RO, or SO until the kit is issued.
To build a Kit, you must first create a Template and assign it to the KIT category. This is what enables the system to reserve the selected components in stock.
1. Create a Template for the Kit
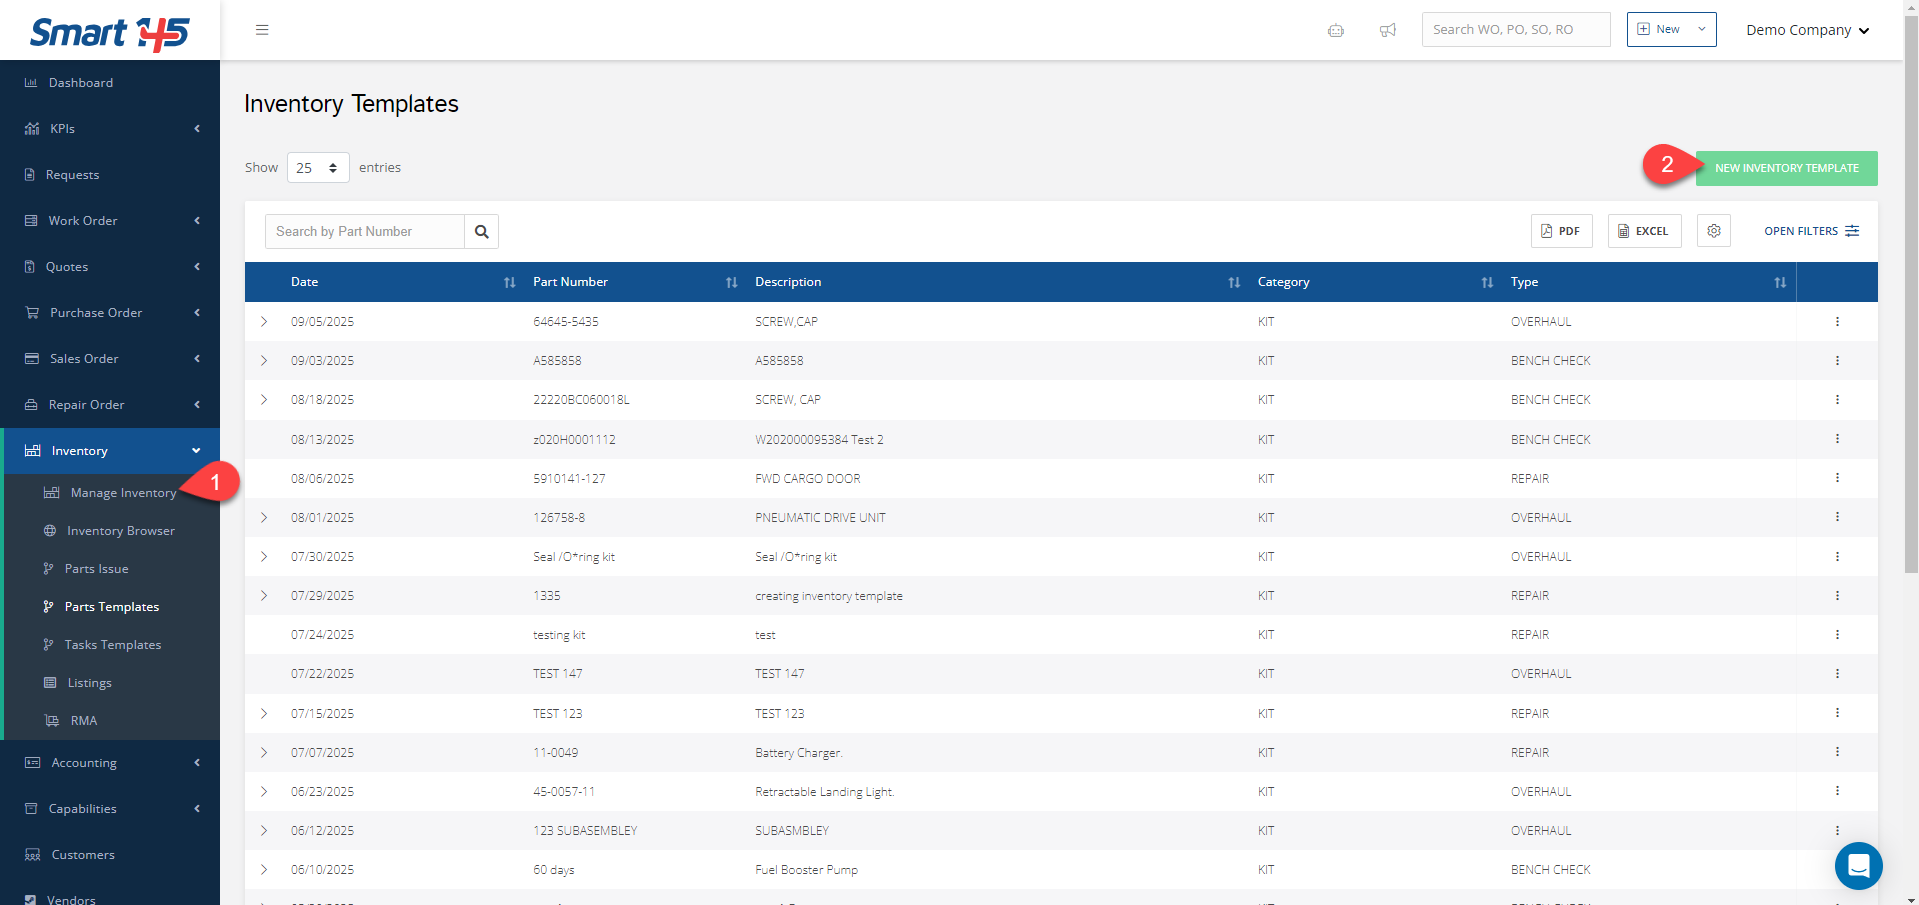
- Go to Inventory > Parts Templates.
- Click New Inventory Template.
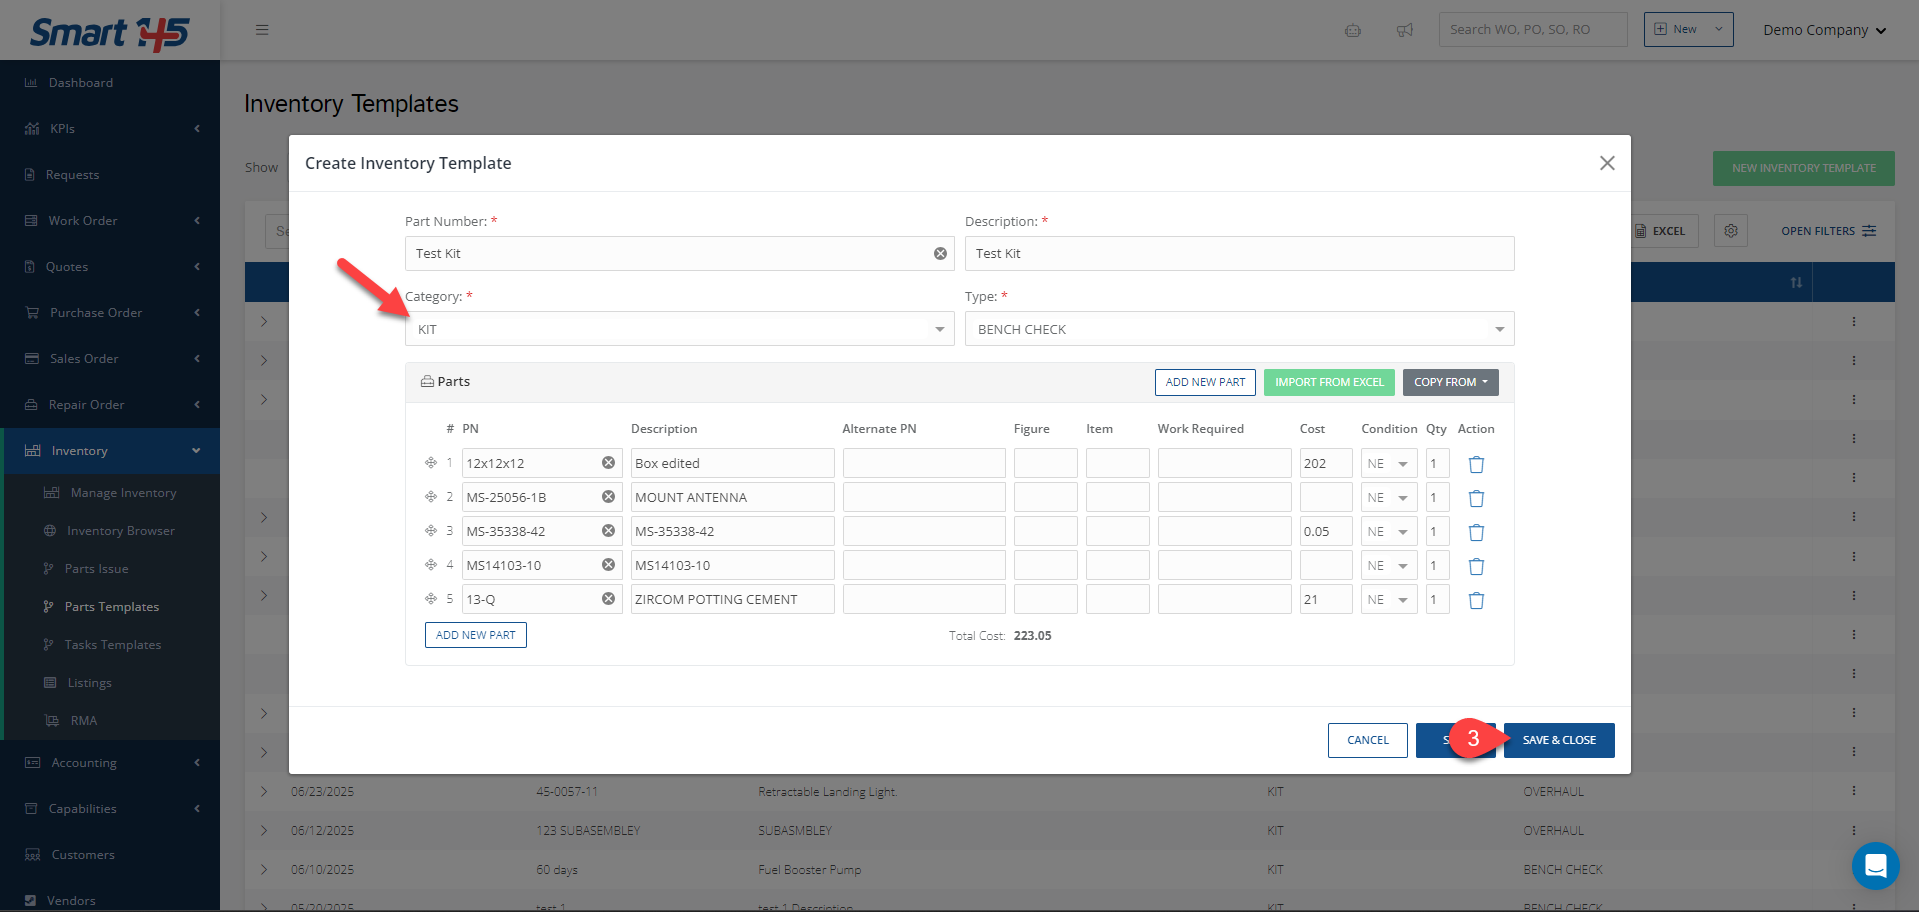
- Enter the required details and set the category to KIT.
- Save the Template
2. Build the Kit from the Template
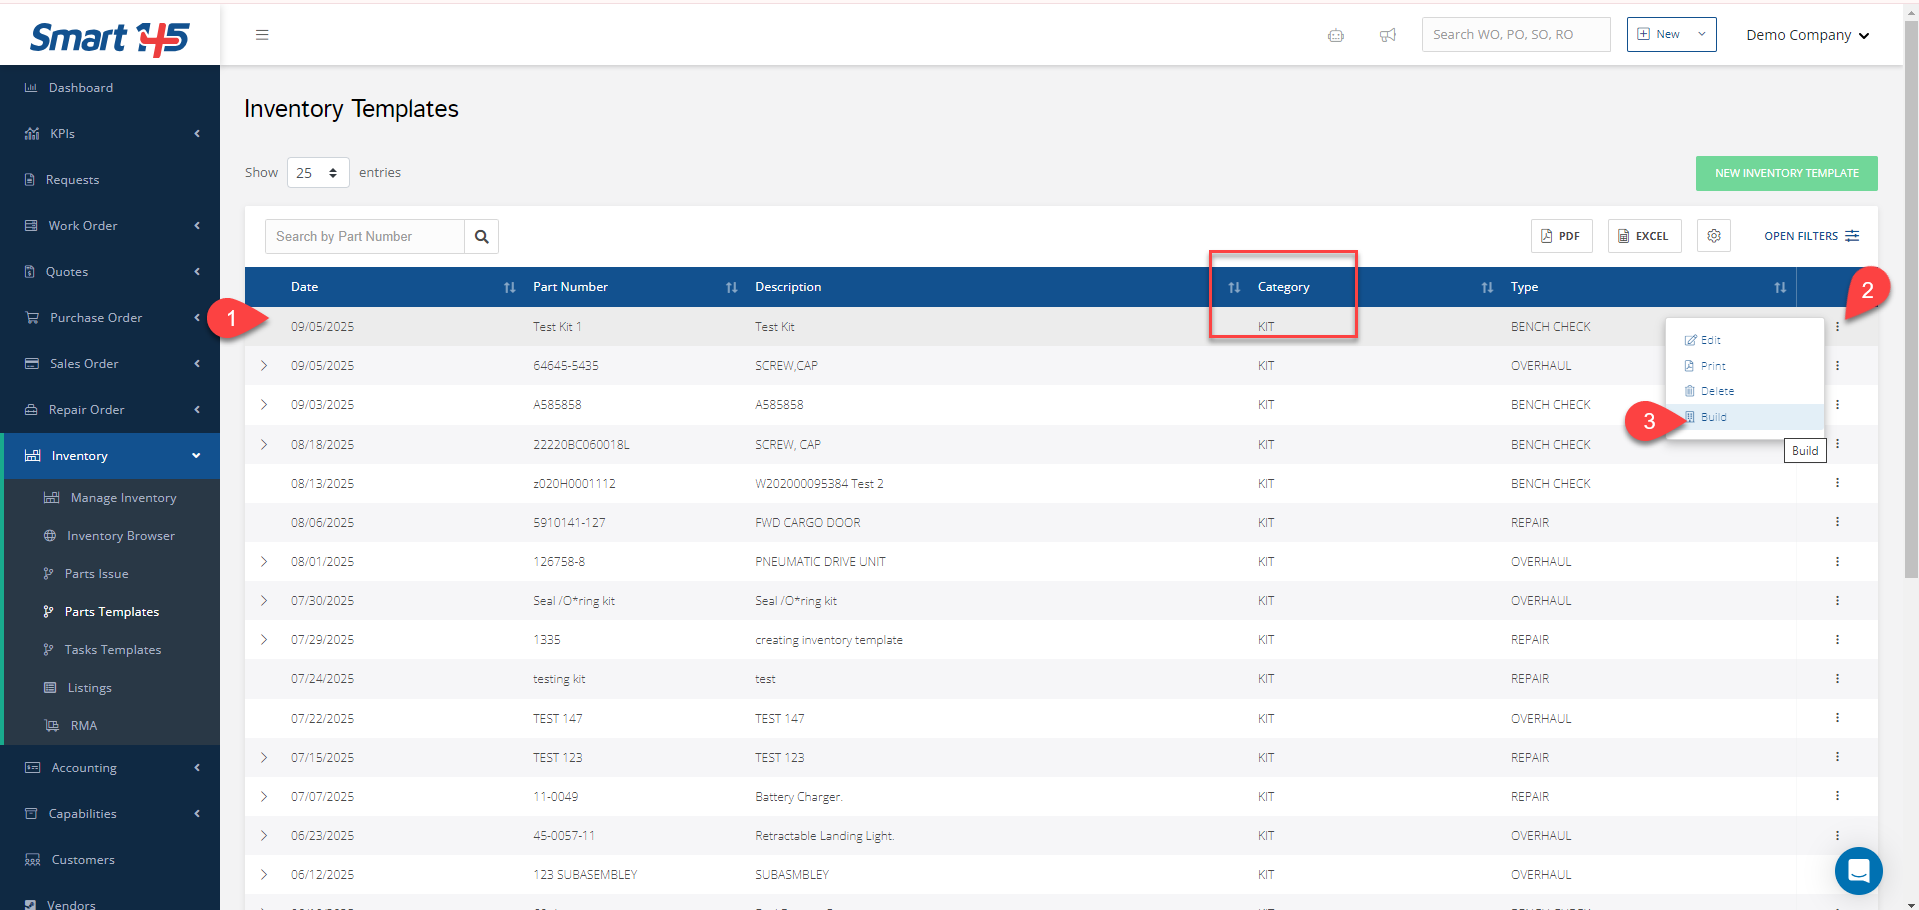
- Look up the Template Part Number/Name in the Parts Templates module.
- Confirm that its category is KIT.
- From the three-dot menu on the right, click Build.
3. Add or adjust components
- To add parts, click the plus (+) icon.
- To remove parts, click the trash can icon.
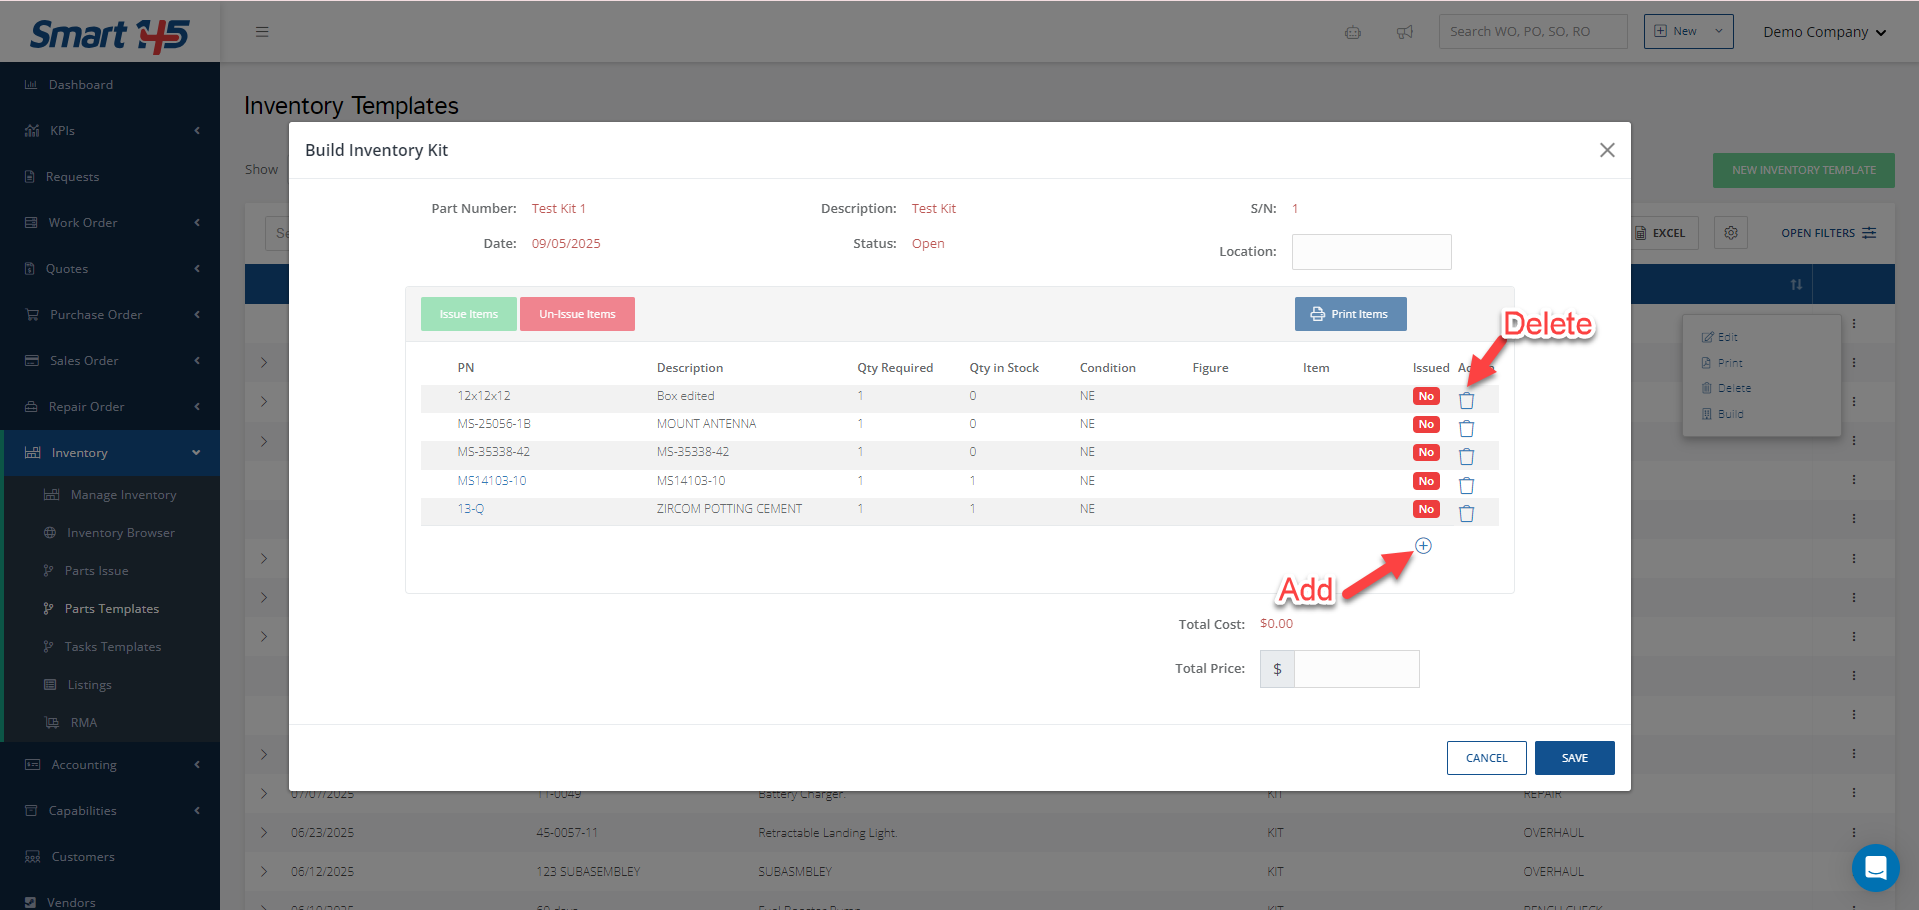
After you add or adjust the parts, you can either Save the Kit directly or Issue the components first (if the parts are already in stock).
Take into consideration that when you issue, the system will immediately reduce the on-hand balances for each part in stock and tie them to the Kit.
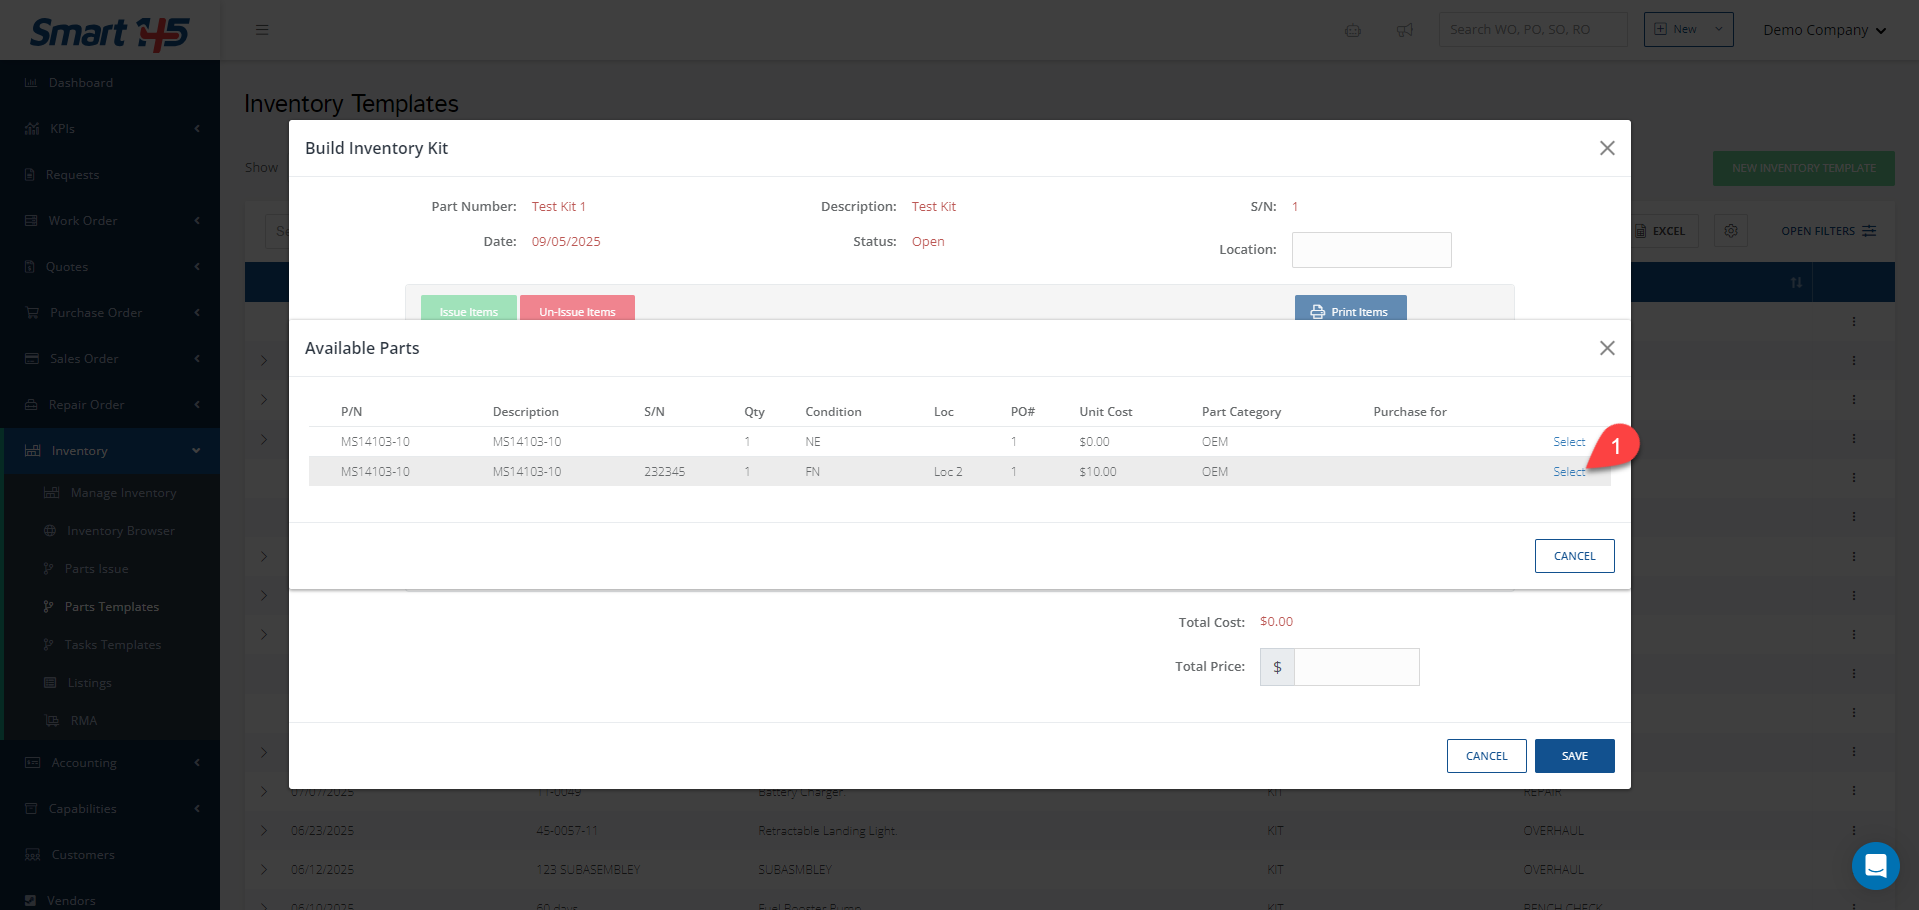
4. Issue the parts
- Click on each item in the Kit.
- A new window will appear showing the stock available.
- Select the line item you want to reserve for the Kit.
- Once you have finished reserving all the required parts, click Issue Items
- Save.

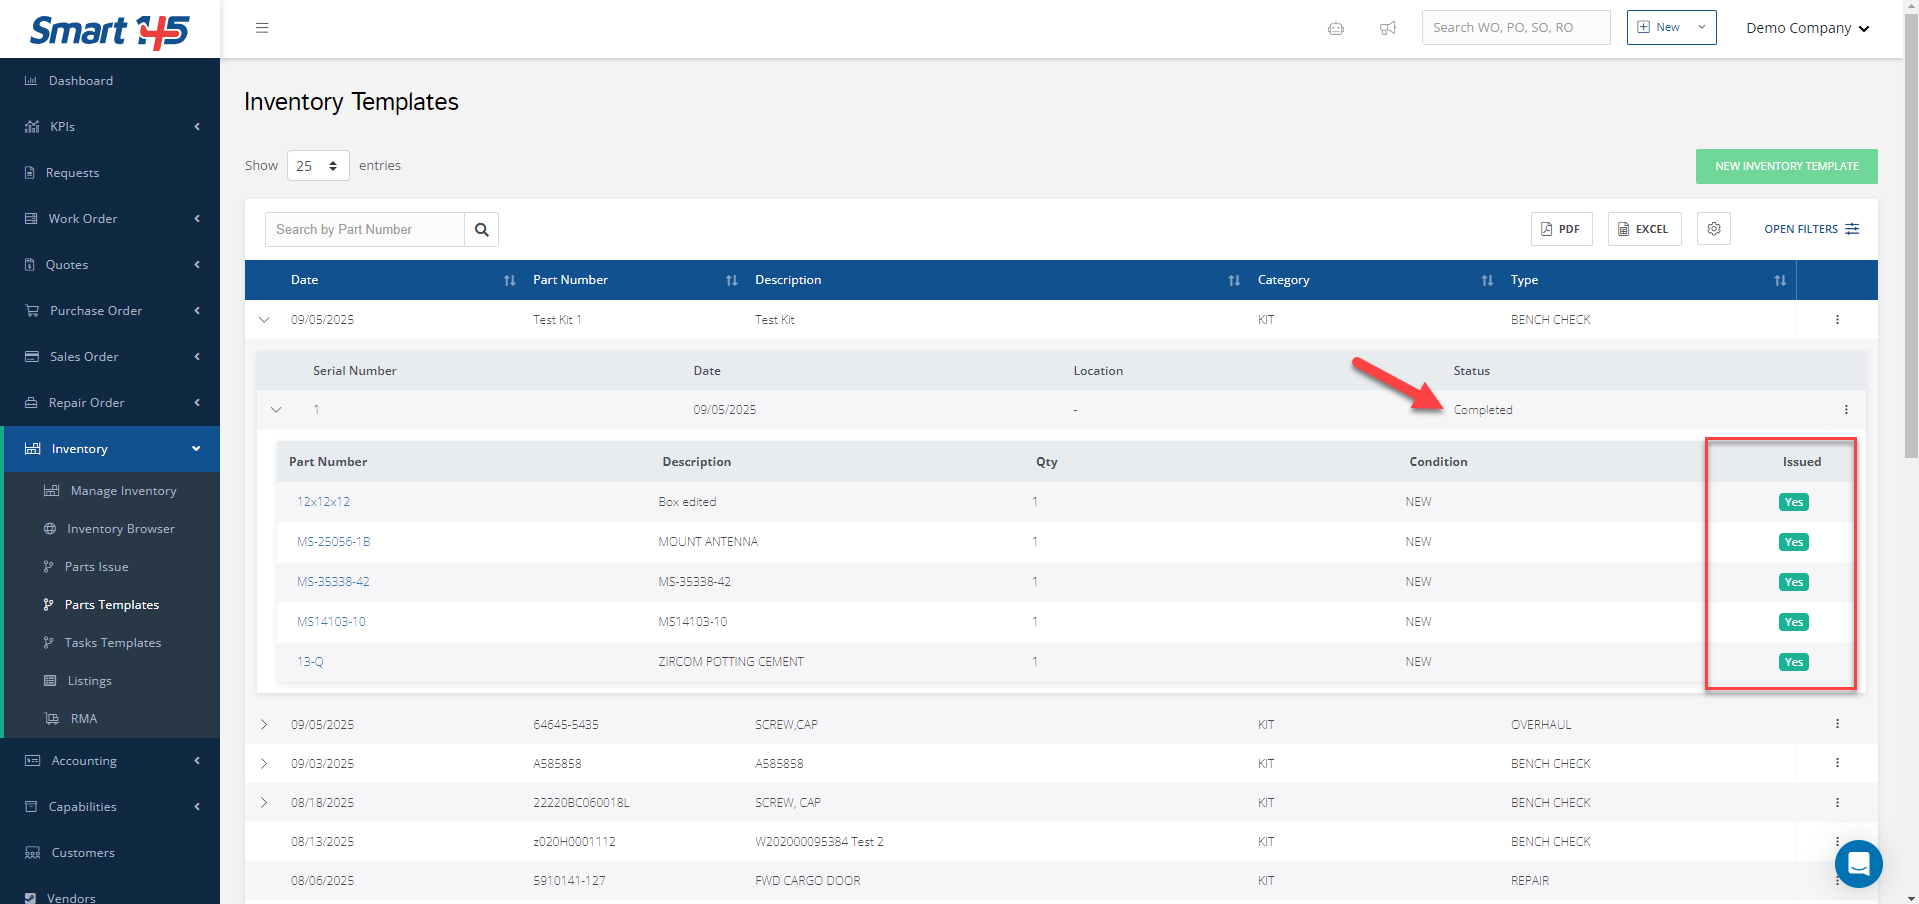
5. Final steps
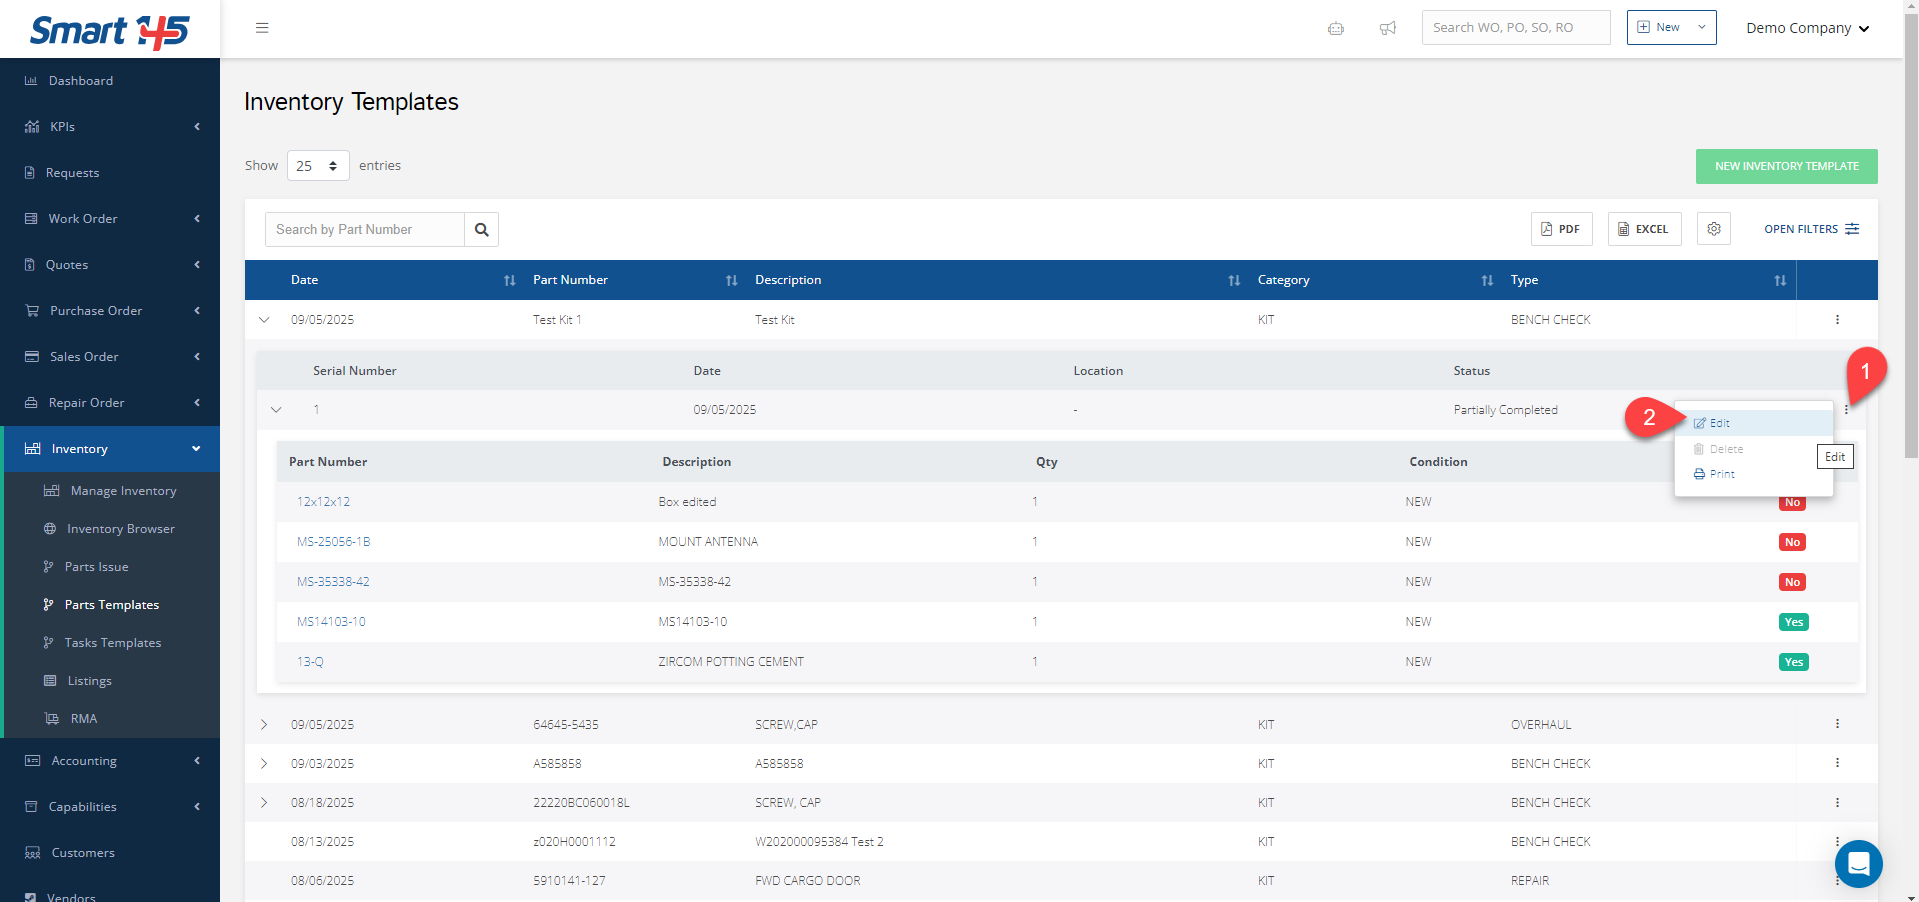
After saving, the new Inventory Kit will appear under the Main Template. The first Kit created will take SN 1, and you can create as many Kit combinations as needed.
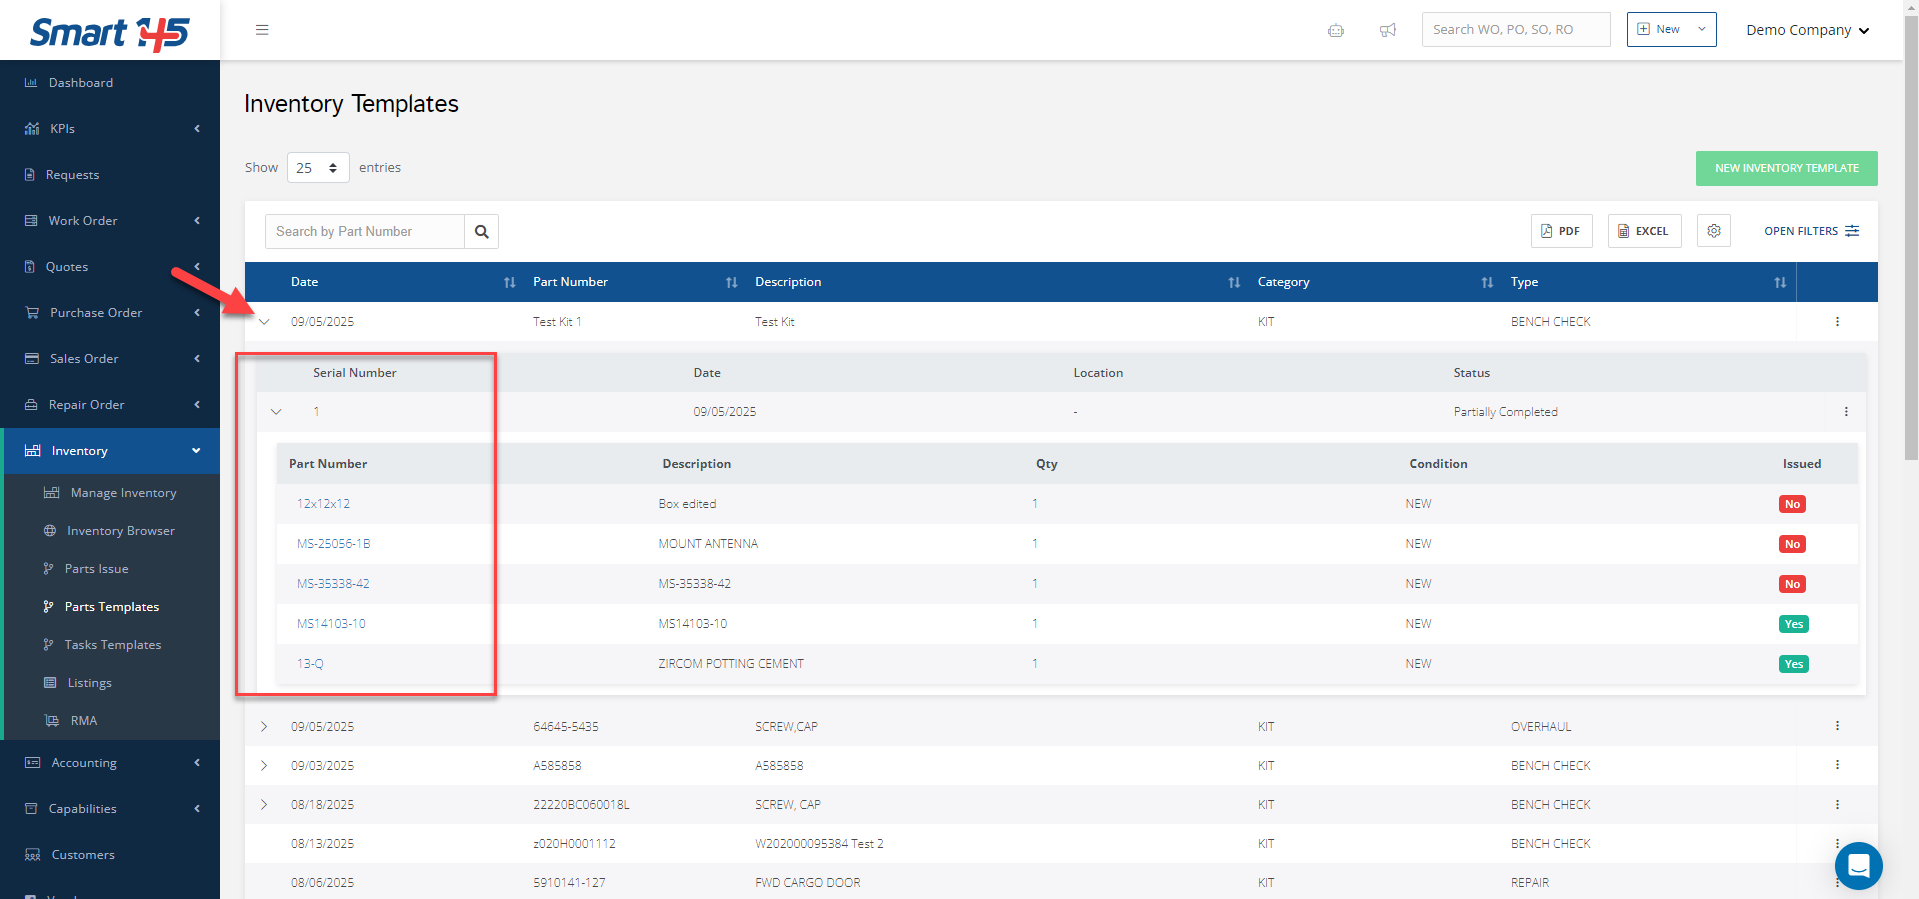
If you didn’t issue all the parts at once, you can do so later by selecting Edit from the three-dot menu next to your kit and following Step 4 (Issue the parts).
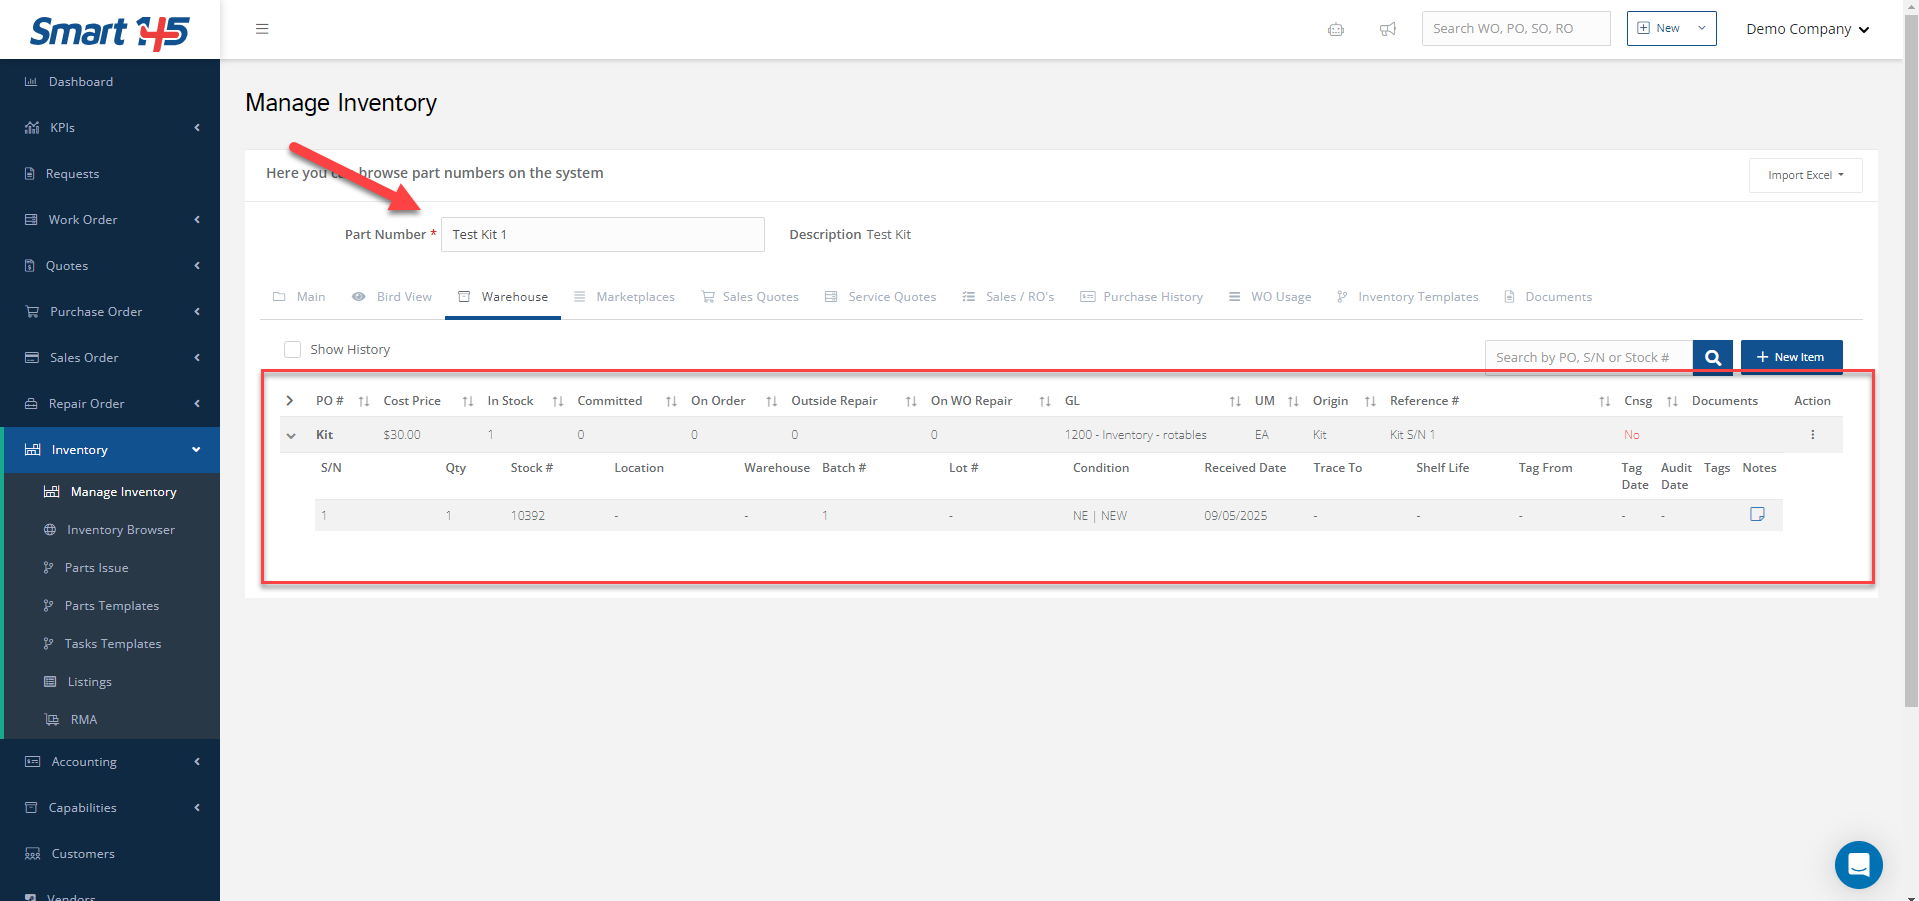
Note: The Inventory Kit will only appear in Manage Inventory > Warehouse once all parts have been issued and the Kit status is set to Completed. Only then will it be available for future orders.